
Basic Car Inspection Checklist: What to Check, When, and Why It Matters
A car can travel over 200,000 miles with proper maintenance — or fail before 100,000 without it. The difference often comes down to one habit: following a basic car inspection checklist. Whether you drive a daily commuter or manage a fleet of vehicles, knowing what to check, how often, and why it matters can prevent costly breakdowns and keep you safe on the road.
Most mechanical failures don't happen without warning. Worn brake pads, low fluid levels, and cracked belts all send signals before they become serious problems. A structured inspection routine catches these issues early, when repairs are simple and inexpensive rather than urgent and costly.
This article covers the essential systems every driver and technician should inspect, how to organize checks by interval, and what modern shop tools — like digital vehicle inspections — can do to make the process faster and more accurate. Whether you're a car owner doing a weekend walkaround or a professional technician processing dozens of vehicles a week, this guide gives you a clear, authoritative reference.
Table of Contents
- What Is a Basic Car Inspection?
- The Basic Car Inspection Checklist (Point by Point)
- Conclusion
- Frequently Asked Questions
What Is a Basic Car Inspection?
A basic car inspection is a structured review of a vehicle's key systems and components to confirm they are safe, functional, and within acceptable condition standards. Its purpose is to identify problems before they cause a breakdown, accident, or failed compliance test. The scope of that review, however, depends entirely on context.
A basic inspection is not a single standardized process — it is a category that includes several distinct inspection types, each with a different purpose, scope, and authority behind it.
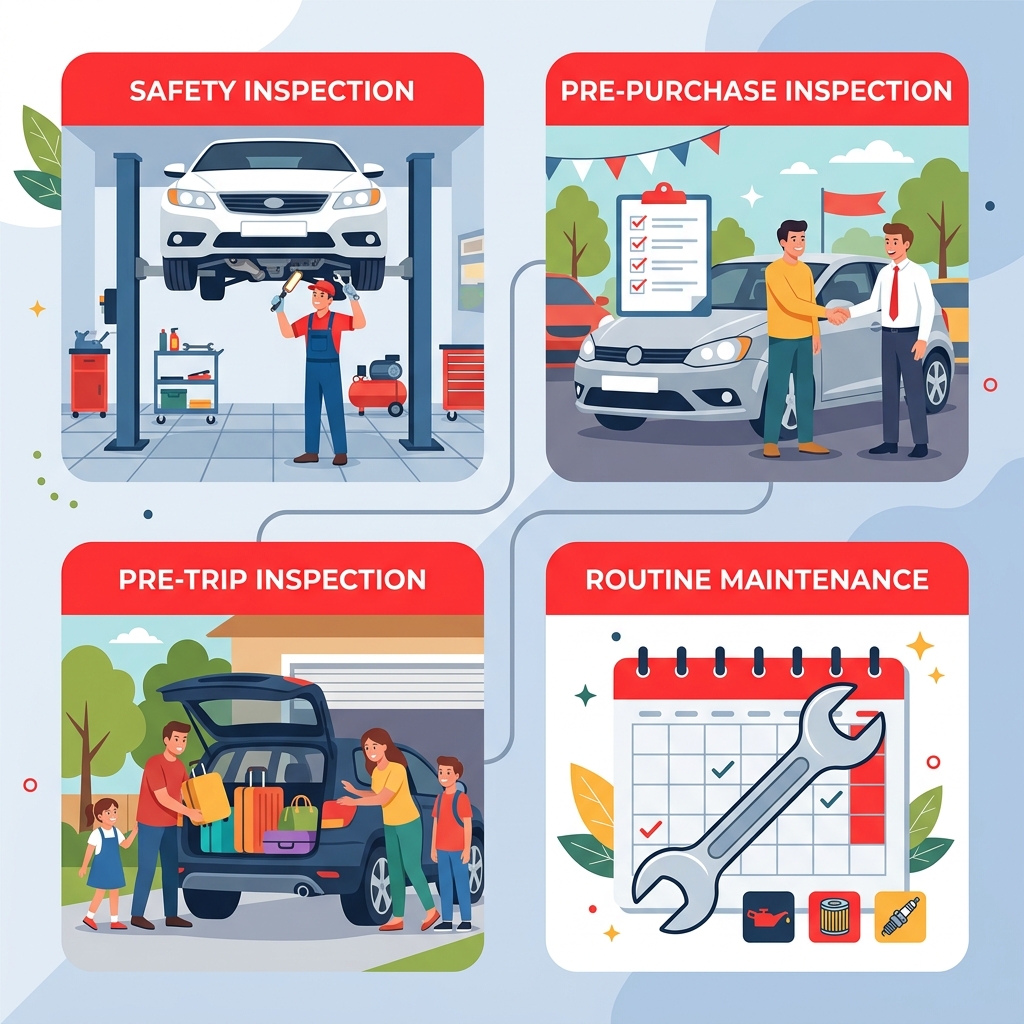
This distinction matters. A state safety inspection is a legal compliance check performed by a licensed facility. A pre-purchase inspection is an independent evaluation of a used vehicle before a sale. A pre-trip inspection is a safety walkthrough before operating a vehicle on the road. A routine maintenance check is a periodic review tied to mileage or manufacturer intervals. These are related but not interchangeable.
What Is a 7-Point Inspection?
A 7-point inspection is a condensed safety check that covers the most critical vehicle systems in a single visit. It is commonly offered as a quick-service item at tire shops, oil change centers, and dealership service lanes. The seven points typically covered are:
- Tires — tread depth, inflation pressure, and visible damage
- Brakes — pad thickness and fluid level
- Battery — terminal condition and charge state
- Lights — headlights, taillights, and turn signals
- Fluids — oil, coolant, and windshield washer levels
- Belts and hoses — visible wear or cracking
- Filters — air filter condition
The 7-point format is designed for speed, not depth. It catches obvious issues but does not substitute for a full multi-point inspection on a high-mileage vehicle or before a significant purchase.
Types of Car Inspections and When Each Applies
The table below summarizes the four primary inspection types, what they cover, how often they occur, and who typically performs them.
| Inspection Type | Primary Purpose | Typical Scope | Frequency | Performed By |
|---|---|---|---|---|
| State Safety Inspection | Legal compliance | Brakes, lights, tires, steering, emissions (where required) | Annually or biennially | Licensed state-certified facility |
| Pre-Purchase Inspection | Evaluate used vehicle before buying | Full mechanical and structural review, undercarriage, OBD codes | Once, before sale | Independent mechanic or dealership |
| Pre-Trip Inspection | Confirm roadworthiness before travel | Tires, fluids, lights, brakes, wipers, interior controls | Before each trip (required daily for commercial drivers) | Driver or fleet technician |
| Routine Maintenance Check | Catch wear items on a mileage schedule | Fluids, filters, belts, brakes, tires | Every 5,000–15,000 miles depending on manufacturer | Auto repair shop |
Each type operates under different rules. State inspections are governed by law — failing one means the vehicle cannot be legally operated until repairs are made. Pre-purchase inspections are voluntary but widely recommended; consistently shows that undisclosed mechanical issues are among the leading sources of post-sale disputes on used vehicles. Pre-trip inspections are mandatory for commercial motor vehicle operators under. Routine maintenance checks follow manufacturer service schedules and are the most common type the average vehicle owner encounters.
In practice, a single shop visit may combine elements of more than one type — for example, a routine oil change that also includes a courtesy multi-point inspection and a check for any pending state inspection items.
Types of Car Inspections and When Each Applies
Four inspection types appear most often in automotive contexts: state/safety inspections, pre-purchase inspections, pre-trip inspections, and routine maintenance checks. Each serves a distinct purpose, is performed at different intervals, and carries different consequences if skipped.
| Inspection Type | Primary Purpose | Typical Frequency | Who Performs It |
|---|---|---|---|
| State/Safety Inspection | Verify legal roadworthiness and emissions compliance | Annually or biennially, per state law | Licensed state-certified technician |
| Pre-Purchase Inspection | Assess vehicle condition before a private or dealer sale | Once, before purchase | Independent mechanic or shop |
| Pre-Trip Inspection | Confirm vehicle is safe for an upcoming journey | Before any long trip; daily for commercial drivers | Driver or fleet technician |
| Routine Maintenance Check | Monitor wear and catch problems early | Every oil change or 5,000–7,500 miles | Shop technician or vehicle owner |
State and Safety Inspections
A state inspection is a legally required examination that determines whether a vehicle meets minimum safety and emissions standards set by state law. Requirements vary significantly. Some states, such as California, emphasize emissions testing under the. Others focus primarily on mechanical safety items. A vehicle that fails a state inspection cannot legally operate on public roads until the identified deficiencies are corrected and a reinspection is passed.
Pre-Purchase Inspections
A pre-purchase inspection (PPI) is conducted before a buyer commits to acquiring a used vehicle. Its scope is broader than a safety inspection — a qualified mechanic examines structural integrity, frame condition, signs of prior collision repair, fluid leaks, and major system wear. From experience, a PPI on a vehicle priced at $10,000–$20,000 can identify faults that justify significant price negotiation or prevent a costly mistake entirely. The cost of a PPI typically ranges from $100 to $200, according to.
Pre-Trip Inspections
A pre-trip inspection focuses on confirming a vehicle is ready for immediate operation. For personal vehicles, this is an informal but valuable check before a long drive. For commercial drivers, the Federal Motor Carrier Safety Administration (FMCSA) mandates a formal pre-trip inspection process before each shift — failure to comply carries federal regulatory consequences. The seven-step commercial pre-trip process is covered in detail later in this article.
Routine Maintenance Checks
A routine maintenance check is not a formal inspection in the regulatory sense. It is a systematic review performed at regular service intervals to track wear trends and catch developing problems before they become failures. In practice, most professional shops include a complimentary multi-point check with every oil change, covering tires, brakes, fluids, and lights.
Skipping routine checks does not eliminate wear — it eliminates the opportunity to catch wear before it becomes a breakdown or a safety incident.
Knowing which inspection type applies to a given situation determines both the scope of the check and the appropriate professional to perform it. The next section provides a point-by-point checklist organized by vehicle system, applicable across all four inspection contexts.
The Basic Car Inspection Checklist (Point by Point)
The checklist below covers every major vehicle system a technician or informed vehicle owner should evaluate during a standard inspection. Each subsection identifies what to check, what to look for, and when a finding requires action.
Tires and Wheels
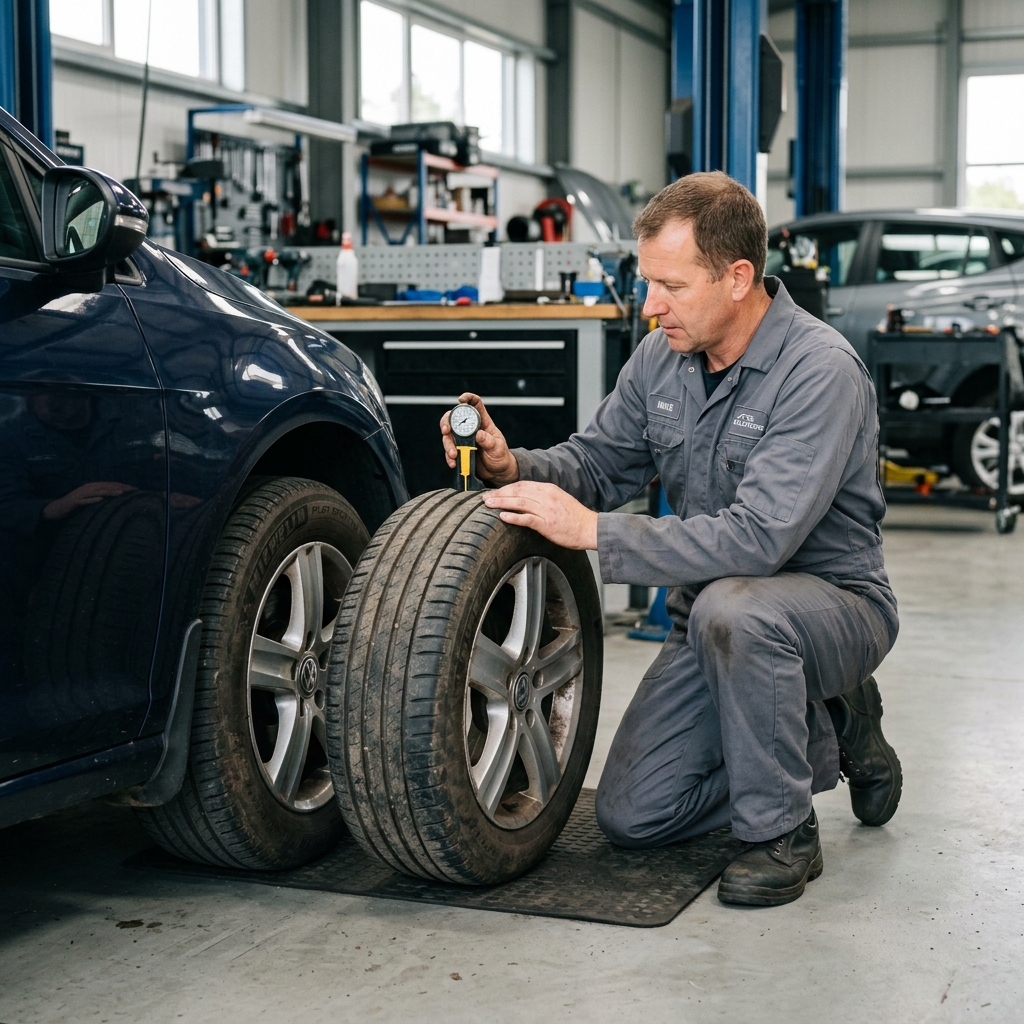
Tires are the vehicle's only contact with the road, making them the highest-priority item on any inspection checklist. Four components require evaluation: tread depth, inflation pressure, sidewall condition, and wheel hardware.
Tread Depth
The legal minimum tread depth in the United States is 2/32 of an inch, as established by most state motor vehicle codes. In practice, tires become significantly less effective in wet conditions once tread drops below 4/32". The offers a simple field check: insert a penny into the tread groove with Lincoln's head facing down. If the top of Lincoln's head is visible, the tire is at or below 2/32" and must be replaced.
Tires worn below 4/32" tread depth increase wet-road stopping distances by as much as 87 feet at highway speeds, according to NHTSA research.
Inflation Pressure
Check tire pressure when tires are cold — before driving more than one mile. The correct pressure is listed on the driver's door jamb sticker, not on the tire sidewall. The sidewall figure is the maximum pressure the tire can hold, not the recommended operating pressure. Underinflation increases heat buildup and rolling resistance; overinflation reduces the contact patch and compromises grip.
Sidewall Condition
Inspect each sidewall for:
- Bulges or bubbles (indicate internal structural damage — replace immediately)
- Cracks or dry rot (common in tires over six years old)
- Deep cuts or punctures that reach the inner liner
Tires more than ten years old should be replaced regardless of remaining tread, as rubber compounds degrade over time even with low mileage.
Lug Nuts and Wheels
Confirm all lug nuts are present and seated correctly. Look for rust streaks radiating from lug holes, which can indicate loosening or improper torque. Wheels should show no visible cracks, bends, or corrosion that compromises the bead seal. If the vehicle has a hubcap, remove it to inspect the lug nuts directly.
| Tire Inspection Item | Acceptable Condition | Action Required |
|---|---|---|
| Tread depth | ≥ 4/32" (safe), ≥ 2/32" (legal minimum) | Replace at or below 2/32" |
| Inflation pressure | ±3 PSI of door jamb spec | Inflate or deflate to spec |
| Sidewall | No bulges, cuts, or cracks | Replace if bulge or deep cut present |
| Age | Under 10 years from DOT date code | Replace regardless of tread at 10 years |
| Lug nuts | All present, no rust streaking | Torque to spec; investigate rust |
Brakes and Steering
Brake and steering failures are among the leading mechanical contributors to traffic fatalities. According to, brake-related issues are a factor in approximately 22% of crashes attributed to vehicle failure.
Brake Pads and Rotors
Pad thickness should be measured through the wheel spokes or caliper inspection port where visible. Most pads include a wear indicator that produces a high-pitched squeal when thickness drops to approximately 2–3mm. Rotors should be free of deep grooves, heat spots (blue discoloration), and warping. A pulsating brake pedal under pressure is a reliable indicator of rotor runout or warping.
- Minimum pad thickness: 2mm (many shops recommend replacement at 3–4mm)
- Rotor scoring: Light surface rust is normal; grooves deeper than 1.5mm indicate replacement
- Brake pedal feel: Spongy or low pedal suggests air in the line or fluid loss
Brake Fluid
Brake fluid is hygroscopic — it absorbs moisture over time, which lowers its boiling point and reduces braking performance. Check the reservoir level and compare the fluid color to new fluid. Dark brown or black fluid, or fluid that smells burnt, indicates it is overdue for a flush. Most manufacturers recommend brake fluid replacement every two years or 30,000 miles, though intervals vary.
Power Steering Fluid and Steering Play
Inspect the power steering reservoir for level and condition. Foamy or discolored fluid suggests contamination or a failing pump. For vehicles with electric power steering, no fluid reservoir exists, but note any unusual steering weight or resistance. Excessive steering play — more than approximately 2 inches of free movement at the wheel rim before the wheels respond — warrants further diagnosis.
Driver-detectable warning signs that indicate brake or steering issues requiring immediate inspection:
- Pulling to one side under braking (uneven pad wear or a stuck caliper)
- Grinding noise when braking (metal-to-metal contact — pads fully worn)
- Vibration through the steering wheel at highway speeds (rotor runout or wheel balance)
- Steering wheel off-center when driving straight (alignment or steering component issue)
Lights and Electrical
A vehicle's lighting system is both a safety requirement and a legal compliance item. Most state inspections will fail a vehicle for any inoperative exterior light.
Exterior Lights
Walk around the vehicle with a second person activating each light, or use a wall or garage door as a reflection surface. Check:
- Headlights: Low beam and high beam on both sides
- Taillights: Both sides illuminate with headlights on
- Brake lights: All three, including the center high-mount stop light
- Turn signals: Front and rear, left and right
- Reverse lights: Illuminate when transmission is in reverse
- Hazard lights: All four corners flash simultaneously
A weak or failing battery is one of the most common causes of roadside breakdown in the United States, accounting for roughly 450,000 breakdowns per year, according to AAA road service data.
Battery and Terminals
Inspect battery terminals for white or blue-green corrosion buildup. Corrosion increases resistance and can prevent reliable
Tires and Wheels
Tires are the only point of contact between the vehicle and the road, making their condition directly linked to stopping distance, handling, and blowout risk. A thorough tire inspection covers four elements: tread depth, inflation pressure, sidewall integrity, and wheel hardware.
Tread Depth
The legal minimum tread depth in the United States is 2/32 of an inch, as established by most state safety codes. However, shows that wet-road stopping distances increase significantly once tread drops below 4/32". A tire at 2/32" is already compromised in rain.
The penny test is a reliable field method:
- Insert a penny into the tread groove with Lincoln's head facing down.
- If you can see the top of Lincoln's head, the tread is at or below 2/32" — the tire needs replacement.
- For a 4/32" check, use a quarter. If Washington's head is visible, consider replacing soon.
In practice, technicians check multiple grooves across the tire's width, not just one point. Uneven wear patterns — cupping, feathering, or center wear — reveal underlying issues such as misalignment, improper inflation, or worn suspension components.
Tire Pressure
Incorrect tire pressure is one of the most common and most overlooked vehicle deficiencies. According to NHTSA, underinflated tires contribute to approximately 11,000 tire-related crashes annually in the U.S. Correct pressure is listed on the driver's door jamb sticker, not the tire sidewall (which shows the maximum pressure rating).
Check pressure when tires are cold — meaning the vehicle has been parked for at least three hours or driven fewer than one mile. Pressure drops roughly 1 PSI for every 10°F decrease in ambient temperature, making seasonal checks essential.
Sidewall and Overall Condition
Inspect each tire for:
- Cracks or dry rot along the sidewall
- Bulges or bubbles, which indicate internal structural failure
- Cuts, punctures, or embedded objects
- Irregular deformation when the vehicle sits at rest
A bulge in the sidewall means the tire's internal structure has already failed. Driving on it — even briefly — risks a sudden blowout.
Any of these conditions warrant immediate replacement, regardless of remaining tread depth.
Lug Nuts and Wheel Condition
Loose or missing lug nuts compromise wheel retention and can cause wheel separation at speed. During inspection:
- Confirm all lug nuts are present and torqued to the manufacturer's specification
- Check for rust, cross-threading, or rounded heads that indicate improper installation
- Inspect the wheel itself for cracks, severe curb damage, or corrosion at the bead seat, which can cause air loss
| Inspection Item | Acceptable Condition | Action Required |
|---|---|---|
| Tread depth | ≥ 4/32" (2/32" minimum legal) | Replace at or below 2/32" |
| Tire pressure | Within 5% of door jamb spec | Inflate or deflate to spec |
| Sidewall | No cracks, bulges, or cuts | Replace if any structural damage |
| Lug nuts | All present, torqued to spec | Tighten or replace as needed |
| Wheel condition | No cracks or severe damage | Inspect further or replace |
For shops managing multi-vehicle inspection workflows, recording tire measurements per wheel position — rather than a simple pass/fail — gives customers documented evidence of wear patterns and supports recommendations for rotation or replacement.
Brakes and Steering
Brake and steering systems are among the most safety-critical components on any vehicle. The attributes approximately 22% of pre-crash events to brake-related factors, making brake inspection a non-negotiable part of any vehicle safety review.
Brake Pads and Rotors
Brake pad thickness is measured in millimeters. New pads typically measure 10–12 mm. Most manufacturers recommend replacement at or before 3 mm. In practice, waiting until the wear indicator squeals is acceptable as a minimum threshold, but inspecting at 4 mm gives a buffer before safety is compromised.
Rotor condition matters as much as pad thickness. Inspect rotors for:
- Scoring or deep grooves — caused by metal-on-metal contact from worn pads
- Heat cracking — visible as fine lines radiating from the center
- Warping — typically felt as pulsation through the brake pedal under moderate braking
- Minimum thickness — each rotor has a spec stamped on its edge; falling below this figure requires replacement
Brake Fluid
Brake fluid should be checked at the reservoir under the hood. The level should fall between the MIN and MAX lines. Fluid that appears dark brown or black has absorbed moisture and has degraded — fresh brake fluid is pale yellow or nearly clear. According to, brake fluid should be replaced every two years regardless of color because moisture absorption lowers its boiling point and reduces braking effectiveness.
Soft or spongy brake pedal feel almost always indicates air in the brake lines or a fluid leak — both require immediate professional evaluation before the vehicle is driven further.
Steering Components
Power steering fluid should be checked at its reservoir. Low fluid or fluid that appears foamy or milky signals a leak or contamination. Electric power steering systems do not use fluid, so this step applies only to hydraulic systems.
Steering play refers to the amount of movement in the steering wheel before the front wheels respond. For most passenger vehicles, more than 1–2 inches of free play before the wheels begin turning indicates worn steering components. A technician should also check:
- Tie rod ends for looseness or torn boots
- Ball joints for excessive movement
- Steering rack for fluid seepage
Driver-Detectable Warning Signs
Vehicle owners can identify potential brake and steering problems without specialized tools. Common symptoms include:
| Warning Sign | Likely Cause |
|---|---|
| Squealing or grinding when braking | Worn brake pads or metal-on-metal rotor contact |
| Pulling to one side while braking | Uneven pad wear or a seized caliper |
| Vibration in the brake pedal | Warped rotors |
| Vehicle drifts without braking | Wheel alignment or tire pressure imbalance |
| Heavy or stiff steering | Low power steering fluid or pump failure |
| Clunking over bumps | Worn ball joints or tie rod ends |
From experience, brake and steering problems are rarely sudden — they develop gradually through observable symptoms. Catching these signs early through routine inspection prevents the more expensive component failures that follow neglect. For shops, digital vehicle inspections that include photos of pad thickness and rotor condition make it easier for customers to authorize brake work they can see rather than simply being told about.
Conclusion
A consistent inspection routine is one of the most effective ways to prevent breakdowns, reduce repair costs, and keep vehicles roadworthy. Whether performed by a driver before a long trip, a buyer evaluating a used vehicle, or a technician completing a state-required safety check, the checklist serves the same core purpose: catching problems before they become failures.
The scope of any inspection depends on context. A basic pre-trip walkthrough covers tires, lights, and fluids in under ten minutes. A 32-point shop inspection examines every major system in detail. State inspections add legal compliance requirements — OBD-II readiness, emissions standards, and documentation — that vary by jurisdiction. Understanding which type applies to your situation determines both what to check and how thoroughly.
The checklist is a starting point, not an endpoint. Mileage, vehicle age, and operating conditions all expand the scope of what should be inspected at any given service interval.
For vehicle owners, the practical takeaway is straightforward: schedule a professional inspection at least once per year, or any time a vehicle changes hands, prepares for a long journey, or triggers a dashboard warning light. Between professional visits, the basic checks — tire pressure, fluid levels, lights, and wipers — can be performed in a driveway in minutes and cost nothing.
For shop owners and service managers, the opportunity is to make inspections consistent, documented, and customer-facing. According to industry data cited by the, shops that present customers with documented inspection results — especially with photos — see significantly higher work authorization rates than those using verbal-only recommendations. Standardizing the process protects both the customer and the shop.
Platforms like RedAppy give repair shops the tools to digitize inspection workflows, attach photos to each line item, and connect findings directly to estimates and invoices. This creates a transparent record that customers can review and approve, and builds a vehicle history that supports smarter recommendations at future visits. The built-in AI Repair Assistant further supports technicians with labor times and diagnostic guidance at the point of inspection.
The bottom line for both audiences is the same: a thorough, documented inspection is not overhead — it is the foundation of vehicle safety and sound shop operations. Start with the checklist. Build the habit. The results show up in fewer roadside failures, higher customer trust, and a stronger bottom line.
Frequently Asked Questions
What is a 7 point inspection?
A 7-point inspection covers seven critical safety areas of a vehicle, typically including tires, brakes, lights, fluid levels, battery, belts/hoses, and windshield/wipers. It's a quick but comprehensive check commonly performed by auto service centers or fleet managers to identify obvious safety or maintenance issues. Some variations may substitute or add components like filters or steering systems.
What documents are required for a vehicle inspection in New Jersey?
New Jersey vehicle inspections require a valid registration certificate and proof of insurance at minimum. The vehicle itself must be present, and for emissions testing, the check engine light must be off and the OBD system must be ready. Private passenger vehicles registered in NJ are inspected every two years, and no additional paperwork fee is required since the inspection is free for eligible vehicles.
What does a 32-point inspection checklist include?
A 32-point inspection is a detailed multi-system vehicle evaluation covering areas such as brakes, tires, fluids, belts, hoses, battery, filters, lights, steering, suspension, exhaust, and windshield components. It typically examines both safety-critical systems and general maintenance items to give a full picture of a vehicle's condition. Many dealerships and service chains offer this as part of a routine maintenance visit or seasonal checkup.
What are the 7 steps for a pre-trip inspection?
A standard pre-trip inspection involves: (1) reviewing vehicle documents and driver's license, (2) inspecting the engine compartment, (3) checking the cab interior and controls, (4) performing a walkaround exterior check, (5) inspecting lights and reflectors, (6) checking tires, wheels, and rims, and (7) testing the brakes and emergency systems. This process is federally required for commercial drivers under FMCSA regulations before every trip. Completing and signing a pre-trip inspection report is mandatory for CDL drivers.
Ready to Transform Your Shop?
RedAppy helps auto repair shops create professional digital estimates with photos and videos, send them instantly via text or email, and get customer approvals in seconds. No credit card required to start.