
Check Engine Light After Oil Change: Your 2026
A check engine light after an oil change creates a special kind of frustration. The vehicle just came out of routine maintenance, the engine was supposed to be protected, and now a warning light is staring back from the dash. That doesn't automatically mean major engine damage. In many cases, it points to a simple oversight during service, a minor sealing problem, or a connector that got disturbed while someone was working nearby.
For drivers, the right response is calm, fast checking. For repair shops, the right response is a disciplined process and clear communication. Both sides benefit when the problem gets handled as a straightforward diagnostic event instead of an argument about blame.
Table of Contents
- That Sinking Feeling Your First DIY Checks
- Common Culprits Behind a Post-Service Light
- Knowing When to Head Back to the Shop
- The Professional's Diagnostic Playbook
- Turning a Problem into Proof of Professionalism
- Building Trust One Repair at a Time
That Sinking Feeling Your First DIY Checks
The first minutes matter. A driver who sees a check engine light after oil change service usually wants one answer right away: is the engine safe, or did something go badly wrong?
Start with the simplest items before assuming the worst. The most prevalent cause of a check engine light illuminating immediately after an oil change is a loose, damaged, or improperly seated oil fill cap, which creates a vacuum leak that the vehicle's onboard diagnostics system detects as a pressure inconsistency, as explained by.

Start with the driveway checks
Use this short checklist with the engine off:
- Check the gas cap. Remove it and reinstall it firmly. Tighten it until three distinct clicks are heard.
- Check the oil filler cap. Make sure it's present, threaded correctly, and fully seated.
- Check the oil level. Wait 5+ minutes with the engine off, then verify the dipstick reading sits between MIN and MAX, never above MAX.
- Look around the top of the engine. A loose hose or unplugged electrical connector near the oil filter housing or fill area can trigger a warning.
One published diagnostic breakdown says a loose gas cap accounts for 30 to 40% of all post-oil-change check engine lights, followed by unseated oil filler caps at 20%, incorrect oil viscosity at 15%, disturbed sensors at 15%, and dipstick issues at 10%. That same source also recommends the three-click gas cap check and waiting 5+ minutes before reading the dipstick in a post-service inspection routine, as noted in.
Practical rule: If the light came on right after service and the vehicle otherwise runs normally, check sealing items first. Caps and simple fitment issues are faster to verify than anything else.
What usually works and what usually doesn't
What works is careful rechecking. A cap that's cross-threaded, loose, or left off can set the whole problem in motion.
What doesn't work is guessing. Adding more oil without checking the dipstick, clearing the light without fixing the cause, or continuing to drive while hoping it solves itself can turn a small service oversight into a bigger conversation later.
A driver doesn't need to become a technician in the driveway. But a calm, one-minute inspection can save a wasted trip, or at least give the shop useful information when it's time to call.
Common Culprits Behind a Post-Service Light
A warning light that appears after routine maintenance often comes from the service process itself, not from sudden engine failure. That distinction matters because the repair path is different. The focus should be on what was touched, spilled, moved, or left unsecured during the oil change.
What gets missed most often
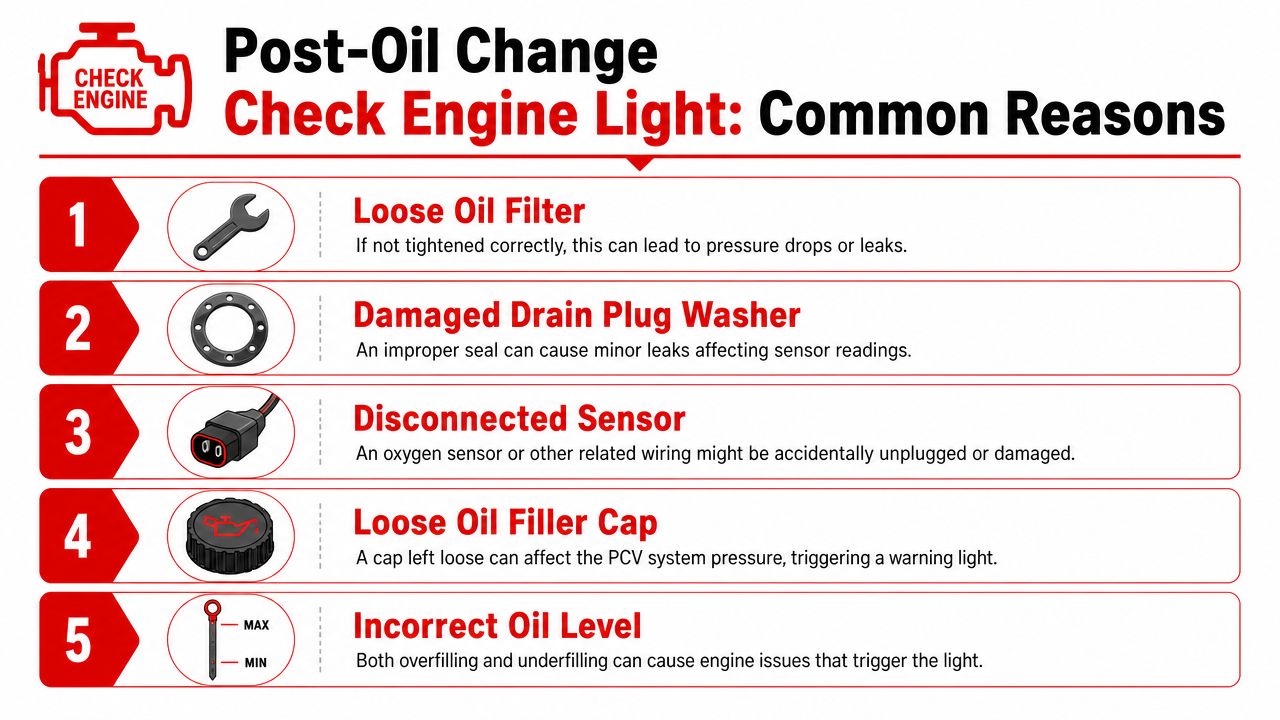
A post-service light can start with simple mechanical details:
| Item | Why it matters |
|---|---|
| Loose oil filter | Can contribute to pressure problems or leakage concerns |
| Damaged drain plug washer | A poor seal can create a leak that changes what nearby systems detect |
| Disconnected sensor | A bumped connector can create an immediate fault |
| Loose oil filler cap | Can upset crankcase or pressure-related readings |
| Incorrect oil level | Overfill or underfill can trigger sensor complaints |
Those are practical shop-floor realities. They aren't exotic failures. They're the kinds of errors that happen when work is rushed, visibility is poor, or the final check gets skipped.
What the service itself can disturb
The second common pattern is contamination or connector disturbance. If oil accidentally contacts sensitive components like the Mass Air Flow sensor, Oxygen sensors, and Camshaft or Crankshaft position sensors, the sensor's electrical resistance changes and the ECU reads that as a fault. That service-related risk is described in.
A sensor problem after an oil change doesn't always mean the sensor was already bad. Sometimes the service bay created the condition. Oil can drip from the filter area. A harness can get tugged while reaching for the filter. A connector tab can look seated when it really isn't.
A good diagnosis asks a simple question first: what was physically touched during the service, and what sits next to it?
Another technical issue is incorrect oil viscosity. Some engines are far less tolerant than others. Turbocharged engines and engines with variable valve timing can react badly when the wrong grade goes in, even if the oil level itself looks fine. In those cases, the vehicle may not have a leak or a loose cap at all. It may be reacting to fluid characteristics the system doesn't like.
That's why generic advice often fails. “Check the oil level” is necessary, but it isn't enough. A vehicle can have the correct level and still set a light because of contamination, disturbed wiring, or the wrong oil choice.
Knowing When to Head Back to the Shop
Some warning lights can wait for a short, careful trip back to the service center. Some can't. The difference comes down to how the vehicle behaves, how quickly the light appeared, and whether there are other symptoms besides the lamp itself.
Signs that can wait a short trip
A steady check engine light, with no rough idle, no smoke, no strange noises, and no obvious loss of power, usually points to a problem that still needs diagnosis but doesn't automatically mean immediate engine damage. In that case, a return visit to the shop is the sensible move.
A customer should bring clear details, not accusations. Helpful details include:
- When it came on. Immediately after leaving, later that day, or after several trips.
- How the car feels. Normal, sluggish, shaking, or stumbling.
- What was checked already. Gas cap, oil cap, oil level, and any visible connectors.
- Whether the light is steady or flashing.
That changes the conversation. The shop can start with facts instead of trying to reconstruct a vague complaint from scratch.
Signs that need professional attention now
A flashing check engine light is different. So are harsh misfires, metallic noises, heavy smoke, or obvious oil leakage. Those symptoms move the problem out of the “likely service oversight” category and into “stop and inspect properly” territory.
If sensor contamination is the cause, driveway troubleshooting usually won't finish the job. When oil reaches a MAF, O2, camshaft, or crankshaft sensor, the sensor signal can change enough that the ECU treats it as a genuine malfunction. That often calls for proper cleaning products, a scan tool, and sometimes replacement instead of guesswork.
A return to the shop isn't a defeat. It's the next proper step when the simple checks don't solve the problem.
A professional shop should respond without defensiveness. The right response is to verify the concern, scan the vehicle, inspect the service area, and explain what was found in plain language. If the problem is service-related, the customer shouldn't have to fight for that acknowledgment.
The Professional's Diagnostic Playbook
For a repair shop, a check engine light after oil change service is a test of process discipline. Shops that handle it casually create distrust. Shops that handle it systematically usually keep the customer.
Start with timing and code context
The first question is timing. If the CEL is triggered within 10 minutes of service, the root cause is likely a knocked connector, often associated with P0000 series codes, rather than low oil. That timing-based diagnostic point is outlined in.
That means the dipstick alone won't settle the issue. The shop needs a scan tool on the car, then a targeted inspection of everything touched during service.
A clean workflow looks like this:
- Pull the codes first. Use a scan tool before moving parts around.
- Verify the complaint. Note whether the light is steady or flashing and whether drivability changed.
- Inspect the last service points. Oil cap, filter housing, drain plug area, dipstick, nearby harnesses, and exposed connectors.
- Check for contamination. Look for oil residue on connector bodies and sensor terminals.
- Confirm the oil specification used. The grade matters, especially on more sensitive engines.
Build a record, not just a repair
The strongest shops document the diagnostic path. That means photos of the oil cap seating, notes on connector condition, code snapshots, and a written record of the oil used. Without that record, the shop is relying on memory in a situation where the customer is already uneasy.
A practical internal checklist might look like this:
- Code capture. Save the initial DTCs before clearing anything.
- Photo evidence. Take close photos of the oil cap, dipstick seating, and any disturbed connector.
- Fluid confirmation. Record the exact oil viscosity installed.
- Final verification. After the repair, road test and confirm the light doesn't return immediately.
Shop-floor standard: If the warning appeared right after service, inspect what the technician touched before chasing deeper theories.
Modern shop systems are beneficial. A scattered paper trail makes small problems look suspicious. A documented repair order with timestamps, notes, and images makes the diagnosis understandable to both the service advisor and the customer.
Turning a Problem into Proof of Professionalism
A customer returning after a warning light comes on is giving the shop a second chance. Shops that see only inconvenience usually lose trust. Shops that see an opportunity to be transparent often keep the relationship intact.
How the front counter should handle it
The right intake language is calm and direct. Listen first. Confirm when the light appeared. Avoid arguing about whether the oil change “couldn't possibly” have caused it.
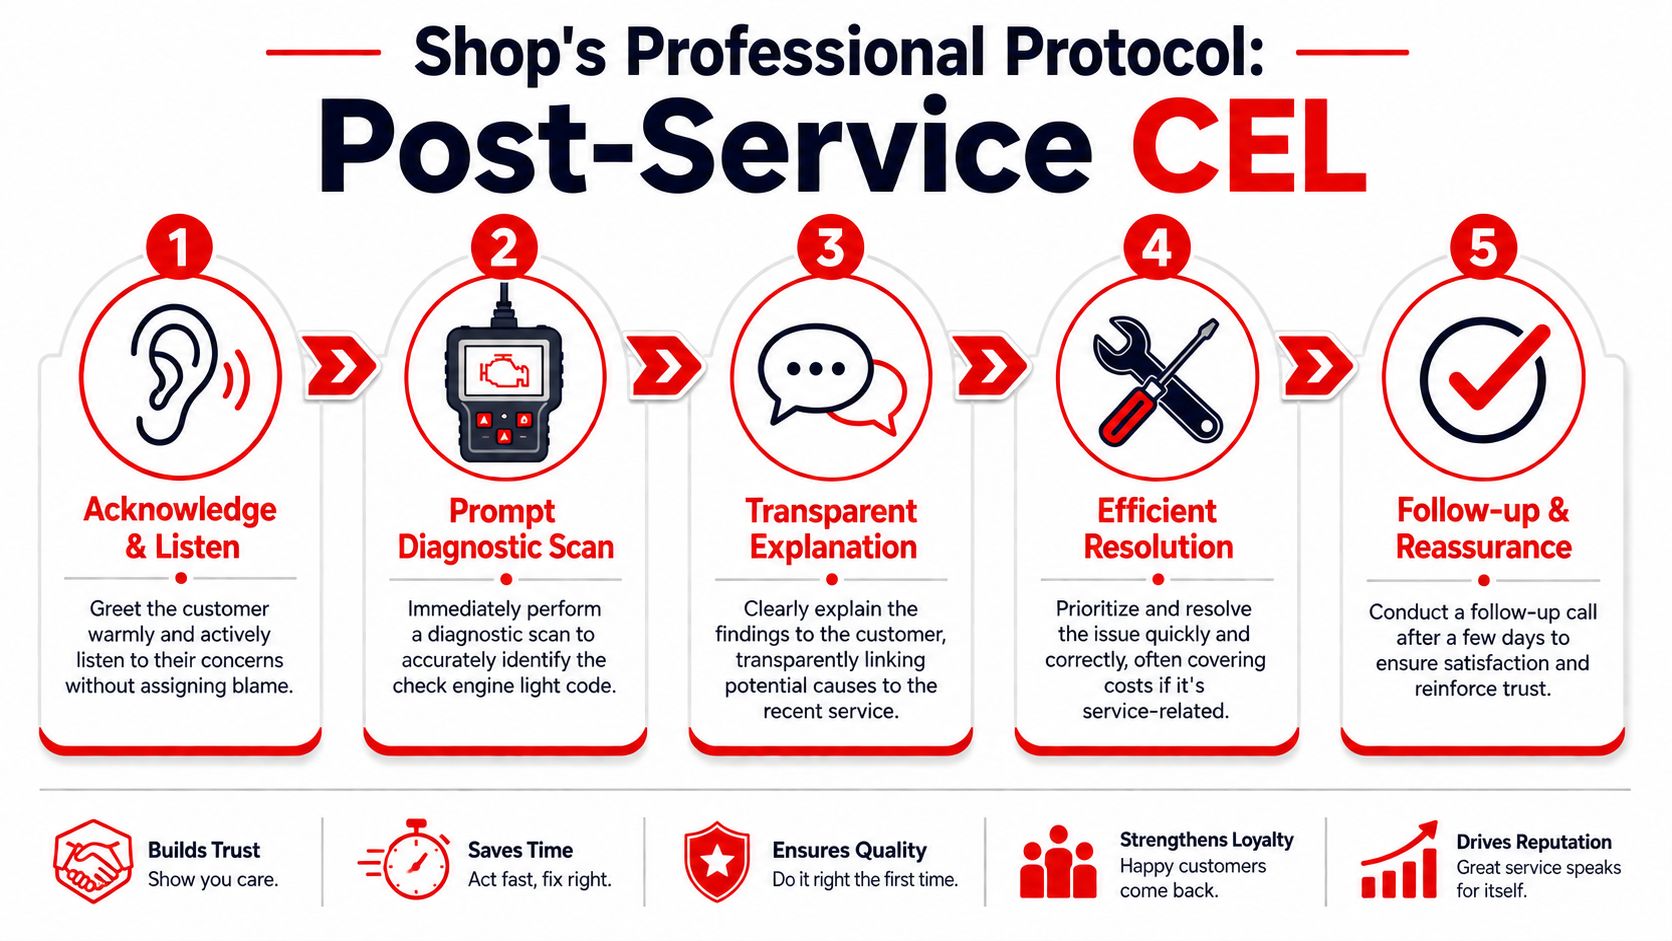
A better process looks like this:
- Acknowledge the concern. The customer just paid for maintenance and now sees a warning light.
- Scan promptly. Don't send them away with a guess.
- Explain cause and effect clearly. If a connector is loose or oil reached a sensor, say so plainly.
- Resolve it fast. Service-related issues should move to the front of the line.
- Follow up later. A quick call after the repair reinforces trust.
Why transparency changes the outcome
Some post-service complaints aren't caused by sloppiness. Oil composition itself can sometimes be part of the story. A frequently asked but poorly answered question is why the CEL comes on when the oil level is perfect. One published explanation notes that switching to high-mileage oil or certain synthetic blends can temporarily alter viscosity enough to trigger a false-positive oil pressure sensor code P0520 in older vehicles, as discussed in.
That matters because the customer may assume the shop made a filling mistake when the actual issue is a sensor reacting to different fluid characteristics. The explanation still has to be handled carefully. “Nothing's wrong” isn't good enough. The customer needs to hear what was tested, what was ruled out, and why the conclusion makes sense.
Clear proof beats reassurance by itself. A customer believes what the shop can show.
Digital inspections, photo sharing, and clean repair documentation make a difference. When a shop can show the disconnected plug that was reseated, the oil residue that was cleaned, or the exact oil specification that was confirmed, the customer stops feeling brushed off. The repair becomes visible, and visible work builds confidence.
Building Trust One Repair at a Time
For drivers, a check engine light after oil change service usually means one thing first. Slow down and verify the simple items before assuming the engine is in serious trouble. A loose cap, an incorrect fill detail, or a disturbed connector is far more likely than a sudden catastrophic failure.
For shops, these comebacks are part of the business. What separates a strong operation from a weak one isn't whether a post-service warning ever happens. It's how the team responds when it does. Fast scanning, targeted inspection, complete notes, and a calm explanation turn a tense moment into a professional one.
The best repair shops don't hide behind vague answers. They show the code, inspect the touched areas, confirm the oil specification, and explain the fix in language the customer can follow. That approach protects the shop and reassures the driver at the same time.
A good process also creates consistency across the team. Advisors know what to say. Technicians know what to check. Managers have documentation if a complaint escalates. The customer sees order instead of improvisation.
Shops that want tighter workflows, clearer documentation, and better customer communication can explore RedAppy to see how a modern platform supports digital inspections, job tracking, and repair transparency, or reach out through the RedAppy contact page to discuss how those tools can fit a growing service operation.
Ready to Transform Your Shop?
RedAppy helps auto repair shops create professional digital estimates with photos and videos, send them instantly via text or email, and get customer approvals in seconds. No credit card required to start.