
Multi Point Inspection Checklist: 8 Key Checkpoints
A customer brings in a vehicle for an oil change. The technician finds worn tires, a weak battery, and a brake concern. At checkout, the customer receives a long list of findings but can't tell what needs attention today, what can wait, or what the technician tested. That gap creates doubt, even when the inspection was thorough.
A structured multi point inspection checklist gives every vehicle the same review and gives every finding a clear meaning. The best version records the condition, measured value, evidence, urgency, recommended action, customer decision, and later repair outcome. It also distinguishes a visual check from a measured test, because a glance at a battery isn't the same as a load test.
The eight checkpoints below cover photo evidence, fluids, brakes, tires, electrical systems, suspension and steering, lighting, and engine and emissions. Each checkpoint includes a practical severity scale and ready-to-send customer wording. Safety-related concerns deserve special care, including guidance on. A checklist should identify risk and improve communication, not promise that every breakdown or crash can be prevented.
Table of Contents
- 1. Digital Photo Documentation and Visual Evidence Capture
- 2. Fluid Level and Condition Assessment
- 3. Brake System Complete Evaluation
- 4. Tire Condition and Alignment Assessment
- 5. Battery and Electrical System Testing
- 6. Suspension and Steering Component Inspection
- 7. Lighting and Visibility System Verification
- 8. Engine Condition and Emission System Assessment
- 8-Point Multi-Point Inspection Checklist Comparison
- Turn Each Checkpoint Into a Clear Customer Report
1. Digital Photo Documentation and Visual Evidence Capture
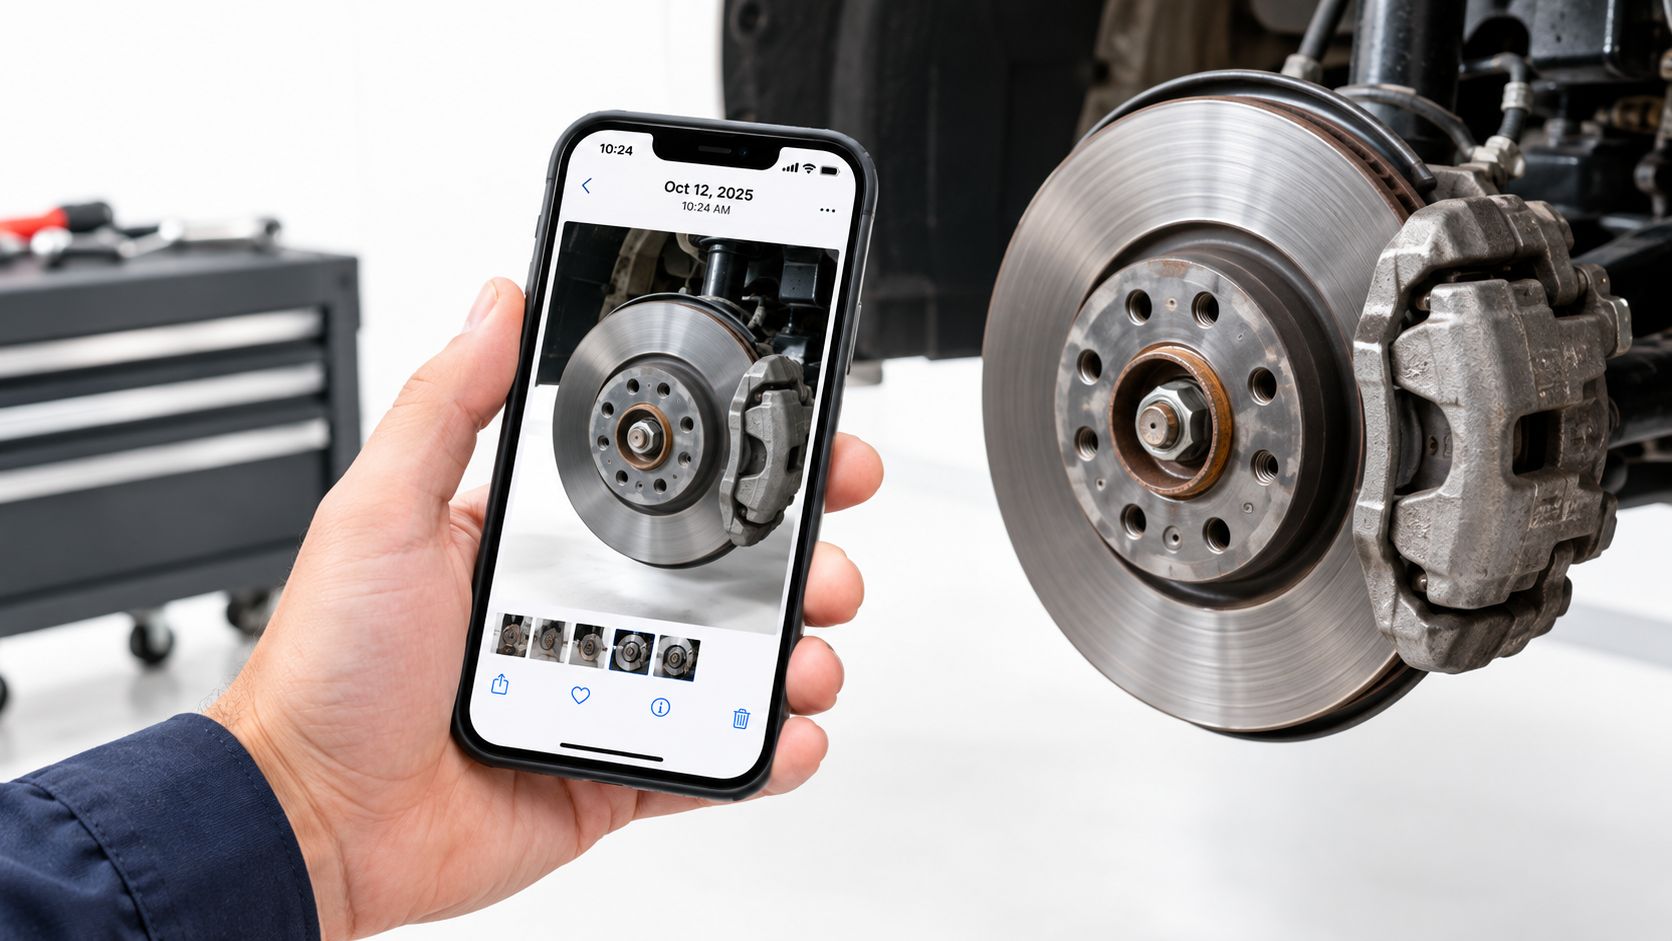
A photograph turns an inspection note into something the customer can verify. It shows the worn tread, leaking hose, cracked belt, damaged sidewall, or low brake-pad material without requiring the customer to stand beside the lift. Photos also preserve what the technician observed at the time of inspection, which supports vehicle history and clearer follow-up conversations.
Capture the image while the component is accessible. Use a wide shot first, then a close-up that shows the defect. A brake rotor photo should include enough surrounding context to identify the wheel position, while the close-up should show scoring, corrosion, or an uneven contact surface. Consistent lighting and angles make repeat inspections easier to compare.
Severity and customer wording
Use three practical dispositions:
- Immediate safety repair: “The right-front tire has visible sidewall damage. The vehicle should not continue normal driving until the tire is replaced.”
- Monitor or maintenance due: “The rear brake pads are wearing unevenly. They remain serviceable based on today's inspection, but the condition should be rechecked at the next visit.”
- Acceptable condition: “The left-front brake assembly was visually inspected and the accessible components show no visible concern today.”
The wording should also state the inspection limit. “Visual inspection completed” is more accurate than implying that every internal fault was ruled out. If a road test wasn't completed, if a shield blocked access, or if specialist equipment was required, the report should say so.
Practical rule: A photo should answer three questions: what was checked, where is the concern, and why does it matter?
A digital record works best when photos are attached to the specific finding, not stored in a general vehicle folder. Shops managing multiple vehicles or locations can use the same photo protocol for every bay. A fleet manager can then review condition evidence without sending every vehicle back for another explanation. Practical workflows for also benefit from records that connect the vehicle, mileage, inspection result, and approval decision.
2. Fluid Level and Condition Assessment
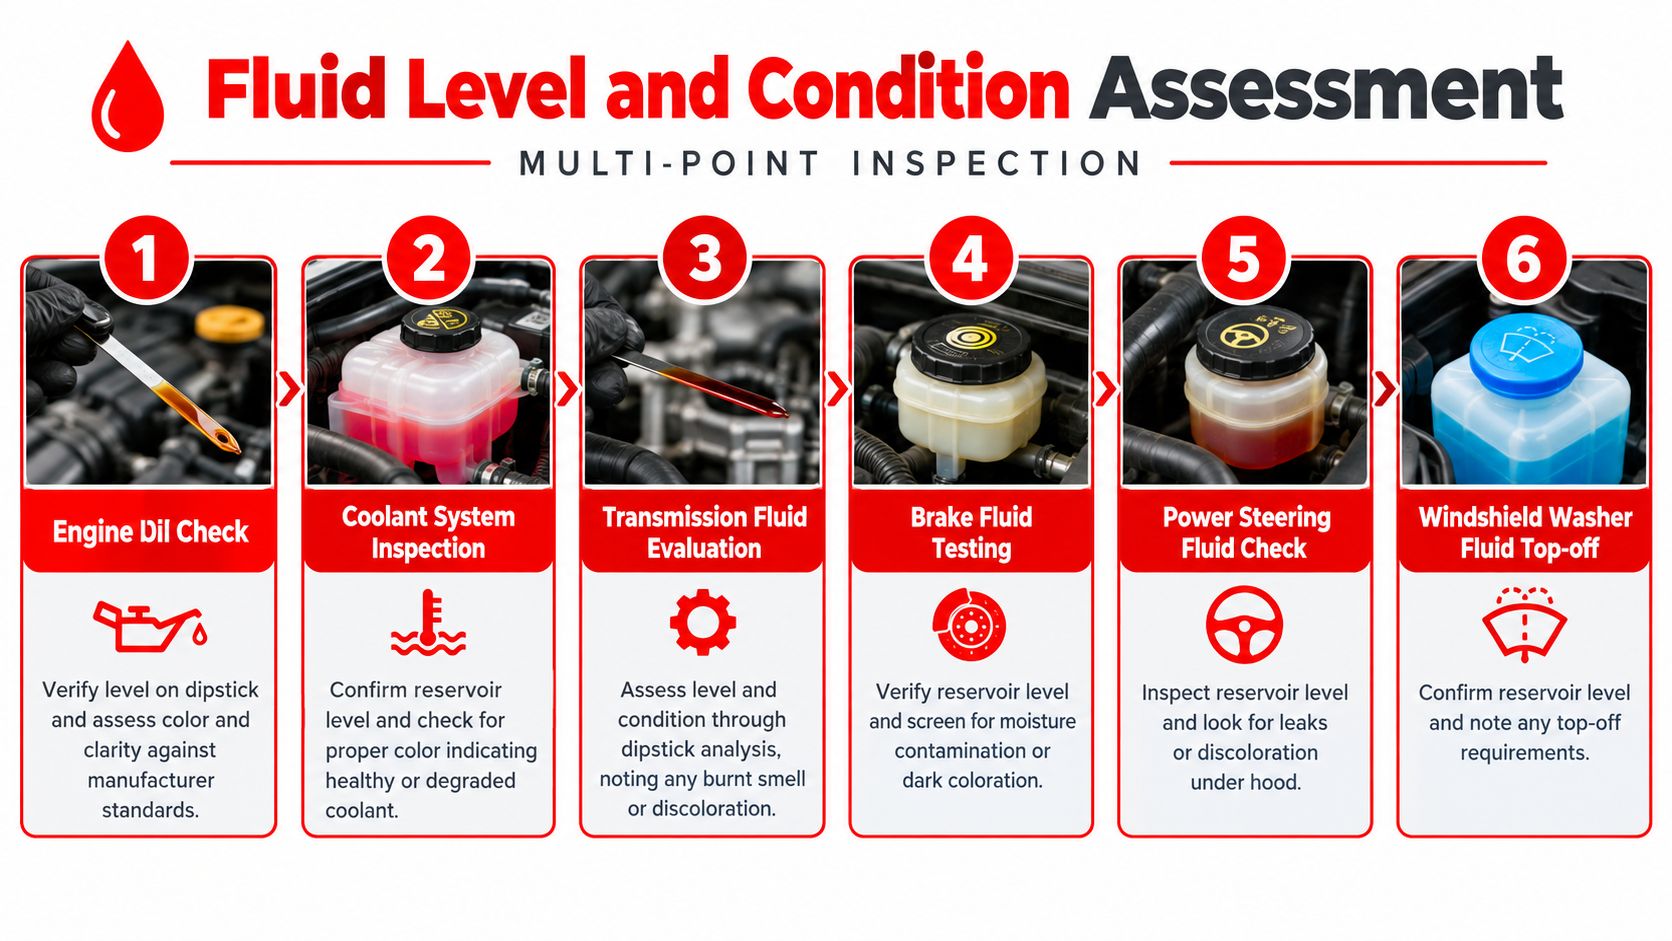
Fluid checks fail when technicians record only “full” or “low.” Quantity and condition are separate findings. Engine oil, coolant, transmission fluid, brake fluid, power steering fluid where fitted, and washer fluid should each have their own line, measurement, and note.
The vehicle should be on level ground when a level reading depends on position. The technician should follow the vehicle maker's procedure for checking temperature, timing, and access. A fluid can be at the correct level and still show contamination, an unusual smell, foaming, metal particles, or evidence of mixing with another fluid.
Severity and customer wording
A useful report separates the observation from the conclusion:
- Immediate safety repair: “Brake fluid level is below the marked range, and the reservoir shows signs of a possible leak. Brake-system diagnosis is recommended before the vehicle returns to normal use.”
- Monitor or maintenance due: “Engine oil level is correct, but the fluid condition indicates scheduled service is due. The next service should include the correct oil and filter.”
- Acceptable condition: “Coolant level is within the marked range, with no visible contamination or leak found during this inspection.”
Technicians should document the location of any leak rather than writing “fluid leak” alone. “Oil residue at the front timing-cover area” gives the service advisor a useful starting point. “Coolant residue below the thermostat housing” is also more actionable than a color-coded warning without context.
A fluid level check isn't a laboratory analysis. If a deeper test is needed, the report should state that clearly. The customer then understands the difference between a visible condition and a confirmed diagnosis.
An inspection report becomes more credible when it includes the measured value, unit, applicable manufacturer or legal threshold, evidence, and recommended action. That structure prevents a technician from treating a slightly dark fluid, a low level, and an active leak as the same problem.
3. Brake System Complete Evaluation
Brake inspection should go beyond looking through the wheel spokes. The technician needs to assess pad material, rotor condition, caliper operation, brake lines, flexible hoses, parking brake operation, and fluid condition. Uneven pad wear can point to caliper or slide problems, while corrosion or damage in a brake line can create a more serious concern than pad thickness alone.
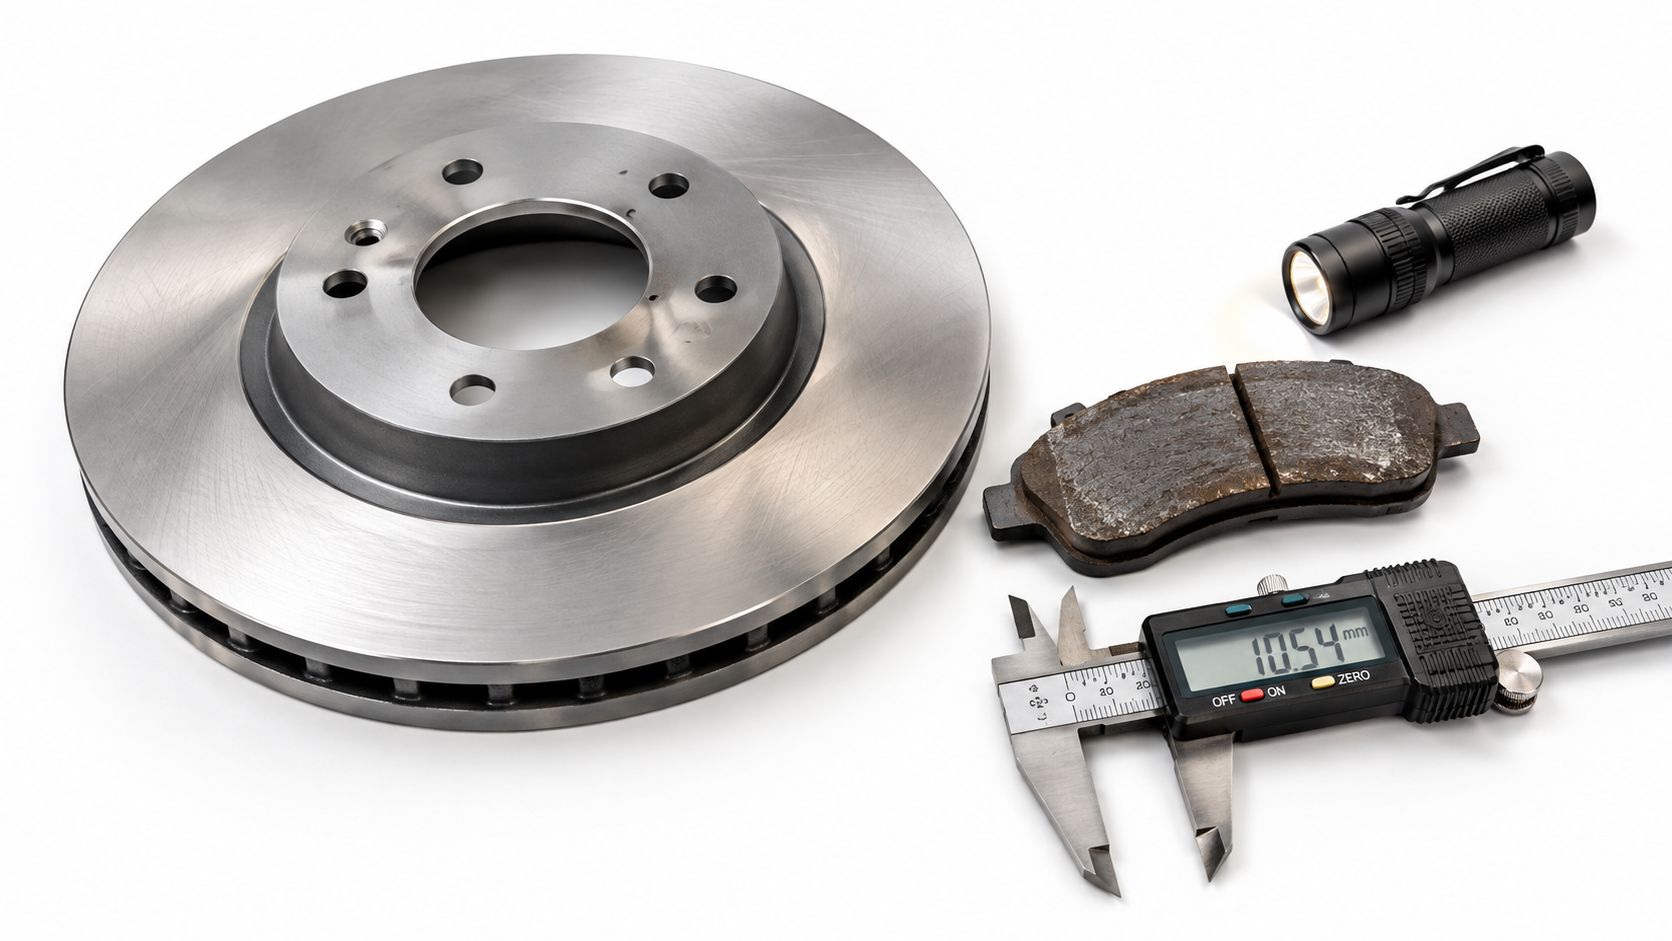
Measure pad material with a brake-pad depth gauge and record the position. If the rotor is accessible for measurement, record thickness against the applicable specification. A photograph should support the finding, especially when the customer can't see the component without removing a wheel.
Severity and customer wording
- Immediate safety repair: “The rear brake hose shows visible deterioration, and the brake system requires further diagnosis before continued driving.”
- Monitor or maintenance due: “The front brake pads have measurable remaining material, but wear is uneven between the inner and outer pads. Caliper operation should be assessed and the condition monitored.”
- Acceptable condition: “Brake pads, rotors, lines, and hoses were inspected at the accessible points. No visible defect was found, and the parking brake operated during the test.”
Brake fluid color alone doesn't prove the complete condition of the system. If moisture content or another test was measured, include the result and unit. If the vehicle received a road test, note braking feel, pull, vibration, noise, and pedal response. If a road test was declined or unsafe, record that limitation instead of presenting the inspection as complete.
Brake findings should tell the customer whether the issue affects stopping performance now, needs planning, or has no present concern based on the tests completed.
A structured workflow can also identify recurring patterns. Frequent omissions in pad measurements, rotor condition, or parking-brake checks may point to a training or process problem. The inspection record should show the finding, evidence, urgency, customer decision, and whether the recommended repair was later completed.
Safety systems don't all carry the same risk. Structural damage that significantly reduces the rigidity of a main load-bearing member is classified as a major defect in the, and damage likely to affect steering or braking receives a more serious classification. The same principle applies to brakes. The report should describe the component, observed damage, possible consequence, and urgency.
4. Tire Condition and Alignment Assessment
A vehicle can leave the shop with acceptable tread and still have a tire problem developing on one shoulder. Inspect and record each tire separately, including the spare. Note cold pressure, tread depth at several points, tread pattern, sidewall condition, punctures, cuts, bulges, cracks, scrapes, and embedded objects. Identify the exact wheel position in every note.
Check pressure with the tires cold, meaning the vehicle has not been driven for at least three hours. NHTSA recommends checking pressure at least monthly, including the spare. Its identifies 2/32 of an inch as the minimum tread depth for replacement. Record the measured value rather than writing “tires good.”
Wear pattern often explains the repair decision. Inner-edge wear can indicate alignment or suspension trouble. Center wear may point to inflation problems, while shoulder wear calls for a closer review of pressure, alignment, and driving conditions. Replacing the tire without addressing the cause can repeat the same wear on the next set.
Severity and customer wording
Use the finding and its likely consequence to set urgency:
- Immediate safety repair: “The right-rear tire has a sidewall bulge. Replace the tire before normal driving.”
- Monitor or maintenance due: “The front tires show greater wear on the inside shoulders than across the center tread. Check alignment and suspension before installing replacement tires.”
- Acceptable condition: “Pressure and tread measurements were recorded at all inspected tire positions. No visible sidewall damage or abnormal wear was found today.”
Give the spare its own result. Four usable road tires do not help if the spare has low pressure or visible damage when needed. Photograph damage that is difficult to describe, and pair the image with the tire position, measurement, recommended action, and urgency. This turns the checklist into a clear customer report rather than a general condition label.
5. Battery and Electrical System Testing
A vehicle may start normally in the bay and still have an electrical fault that appears later. Test results need more detail than a single voltage reading. Record the battery result, terminal condition, charging-system output, starter performance where relevant, and any visible cable or ground concerns.
Separate the battery check from the charging check in the repair order. A weak battery does not prove alternator failure, while an acceptable battery does not rule out voltage loss in the starting circuit. Record the method and result for each test so the customer can see what was checked.
Use the finding and its likely consequence to set the report language:
- Immediate safety repair: “The charging system did not maintain the required output during testing. Further diagnosis is recommended because the vehicle may lose electrical power while driving.”
- Monitor or maintenance due: “The battery passed the basic start test but shows reduced reserve capacity. Plan for replacement before a no-start condition develops.”
- Acceptable condition: “Battery and charging-system checks were completed. Terminals are secure, and no electrical concern was found during today's tests.”
Inspect for corrosion at the terminals, loose clamps, damaged insulation, and signs of acid leakage. Light corrosion may be cleaned during service, but document both the condition and the action taken. Record battery age when known. It helps explain why a borderline result may require replacement planning rather than immediate replacement.
A handheld conductance tester, load tester, multimeter, or charging-system analyzer can support the inspection. The record must identify the test performed and its result. “Battery checked” does not show whether the battery, cables, starter circuit, or charging system was evaluated.
“The battery passed, but the charging system failed its output test. Further diagnosis is recommended before the vehicle is returned to regular driving.”
Check warning messages and scan results as part of the electrical review. For hybrid or electric vehicles, state whether high-voltage checks were performed. A conventional battery test covers only that battery and does not represent an inspection of the entire powertrain.
6. Suspension and Steering Component Inspection
A customer may report a clunk, pull, vibration, or loose steering without knowing its source. Reproduce the concern when possible, then connect it to a specific component. Inspect shocks and struts, springs, control arms, bushings, ball joints, tie rods, steering linkage, wheel bearings where relevant, and visible mounting points.
Use the results to judge both safety and customer priority:
- Immediate safety repair: “Excessive play was found at the right outer tie rod. Steering-component replacement and alignment are recommended before normal driving.”
- Monitor or maintenance due: “The front strut shows reduced damping, and the vehicle has a noticeable bounce after compression. Monitor ride control and tire contact, and plan for replacement.”
- Acceptable condition: “Accessible steering and suspension components were checked for looseness, damage, and leaks. No current concern was found during the completed inspection.”
Record the exact location and direction of any movement. “Suspension checked” gives the customer no useful detail. Note whether looseness could change alignment or vehicle control. Inspect bushings for cracks, separation, and deterioration. During an authorized road test, describe the noise, road condition, steering response, and any pull or vibration.
A bounce test can support a finding, but it cannot replace checks for leaks, play, broken springs, or damaged mounts. Ball-joint inspection depends on the vehicle design and the correct load position. Name the method used so the report does not suggest that one test suits every vehicle.
Alignment should follow diagnosis, not automatically become a recommended sale. Abnormal tire wear may justify an alignment check, but worn steering or suspension parts should be identified first. Alignment readings will not correct the cause when loose components remain in service.
Vehicles with cameras, radar, or lane systems add another consideration. Suspension repairs can change sensor geometry. If calibration is required, state that the vehicle needs specialist equipment or a separate calibration procedure.
7. Lighting and Visibility System Verification
A brake lamp can pass a quick glance and still fail in traffic. Test headlights, brake lamps, tail lamps, turn signals, hazard flashers, reflectors, interior lighting, dashboard illumination, and visible warning indicators where applicable. Repeat checks for flicker, delayed response, incorrect color, and loss of contact when vibration affects the vehicle.
Stop-lamp requirements generally include a steady red light, immediate illumination when the brake is applied, and immediate shutoff when the brake is released. The applicable rules for the vehicle and location should govern the inspection.
Severity and customer wording
- Immediate safety repair: “The left brake lamp does not illuminate consistently during repeated pedal application. A corroded bulb socket was found, and the lighting fault should be repaired before the vehicle is used in traffic.”
- Monitor or maintenance due: “The right headlamp housing contains moisture, and light output may deteriorate. Housing, seal, and wiring diagnosis is recommended.”
- Acceptable condition: “Headlights, brake lamps, indicators, hazard flashers, and accessible warning lights operated during today's inspection.”
Name the exact lamp and condition observed. “Lights failed” gives the customer no useful direction. “Left rear stop lamp intermittent during repeated pedal application” identifies the fault and the next diagnostic step. If the lamp works after the socket is disturbed, record that behavior rather than calling the repair complete.
Visibility checks include wiper operation, washer spray, windshield condition, mirrors, and camera views. A burned-out bulb may need a straightforward replacement. Water inside a housing can point to a failed seal, corroded socket, damaged wiring, or a control fault. A photo or short video helps document an intermittent problem and shows the customer why further diagnosis is recommended.
8. Engine Condition and Emission System Assessment
Start with the engine cold when conditions allow. Look for leaks, damaged belts, split hoses, loose vacuum lines, restricted filters, and signs of coolant loss. Inspect accessible coolant-system parts and compare warning indicators with scan results. Check serpentine-belt condition and tension using the vehicle maker's procedure, since a generic finger-pressure test does not suit every design.
Record findings by location and urgency. A note such as “oil residue at the lower front cover, no active drip observed” separates evidence from an unconfirmed source. Photograph the area when access allows.
Use three report levels:
- Immediate safety repair: “Coolant is actively leaking near the upper hose. Continued driving may cause overheating. Cooling-system diagnosis and repair are recommended before use.”
- Monitor or maintenance due: “The serpentine belt has surface cracks. Plan replacement and inspect the pulleys and tensioner for related wear.”
- Acceptable condition: “Accessible belts, hoses, air filter, coolant area, and emission warning indicators were checked. No visible current concern was found.”
White or dried coolant residue can show an earlier or ongoing leak. Soft hose sections, cracking, swelling, and rubbing need clear descriptions, including the affected component. Photograph the air filter and state its condition without claiming that its appearance alone proves an engine-performance problem.
Emission faults require scan evidence where available. Record stored OBD-II codes and readiness status when relevant, then explain whether the result supports further diagnosis or only monitoring.
Vehicles with ADAS, hybrid, or electric systems need a separate technology check. Mark forward-collision warning, automatic emergency braking, lane-keeping and lane-departure functions, cameras, reversing-camera quality, charge-port condition, high-voltage warnings, charging behavior, and battery-health evidence as tested, not tested, or requiring specialist equipment. The covers these checks because a visual inspection cannot confirm electronic safety performance.
8-Point Multi-Point Inspection Checklist Comparison
| Checkpoint | Core features | Quality (★) | Target (👥) | Value & USP (💰🏆✨) |
|---|---|---|---|---|
| Digital Photo Documentation and Visual Evidence Capture | Multi-angle photos, timestamped records, annotations, galleries, estimate integration | ★★★★★ (high trust) | 👥 Service advisors, customers, managers | 💰↑ approvals, 🏆 dispute-proof evidence, ✨ instant photo-rich estimates |
| Fluid Level and Condition Assessment | Systematic reservoir checks, color/clarity standards, leak detection, interval tracking | ★★★★☆ (preventive) | 👥 Technicians, fleet owners | 💰steady maintenance revenue, 🏆 prevents engine damage, ✨ fluid-age tracking |
| Brake System Complete Evaluation | Pad/rotor measurements, fluid/moisture test, lines & caliper checks, emergency brake test | ★★★★★ (safety-critical) | 👥 Technicians, safety-conscious customers | 💰high-value repairs, 🏆 critical safety assurance, ✨ photo-backed estimates |
| Tire Condition and Alignment Assessment | Tread depth, wear pattern analysis, sidewall check, DOT age, pressure verification | ★★★★☆ (safety & efficiency) | 👥 Drivers, fleet managers | 💰tire & alignment revenue, 🏆 prevents blowouts, ✨ wear-pattern diagnostics |
| Battery and Electrical System Testing | Load/voltage tests, terminal inspection, alternator output, starter checks | ★★★★☆ (reliability) | 👥 Technicians, seasonal customers | 💰predictive replacements, 🏆 reduces roadside failures, ✨ load-test logs |
| Suspension and Steering Component Inspection | Bounce tests, ball joint/play checks, tie rods, bushings, steering-play measurement | ★★★★☆ (handling & safety) | 👥 Technicians, performance-minded owners | 💰high-value suspension work, 🏆 improves control, ✨ mileage-based alerts |
| Lighting and Visibility System Verification | Headlight alignment, brake/turn signal checks, interior/dashboard lights, bulb docs | ★★★☆☆ (quick fixes) | 👥 All drivers, inspectors | 💰frequent & quick sales, 🏆 legal compliance, ✨ photo evidence for approval |
| Engine Condition and Emission System Assessment | Belt/hose checks, leak detection, air filter, emission components, spark/accessory checks | ★★★★★ (critical health) | 👥 Technicians, long-term owners | 💰major-service revenue, 🏆 prevents catastrophic failures, ✨ service-history tracking |
Turn Each Checkpoint Into a Clear Customer Report
A good inspection routine starts with the same order on every vehicle. The sequence can be adapted to vehicle type, service package, and legal requirements, but the core taxonomy should remain stable. Consistency helps technicians avoid skipped categories and helps managers compare results across technicians, locations, vehicle types, and inspection categories.
The checklist should include vehicle identity, mileage, technician, date and time of inspection, test status, finding, evidence, severity, recommendation, customer decision, and repair outcome. Each item should also show whether it was measured, visually checked, road-tested, inaccessible, declined, or sent for specialist testing. This prevents a long list of green boxes from implying more certainty than the technician obtained.
Use a severity scale customers can act on
A practical three-level scale keeps the conversation focused:
- Immediate safety repair: The vehicle may have a condition that affects safe operation. The report should describe the risk and recommended next step without overstating certainty.
- Monitor or maintenance due: The vehicle can usually be discussed as a planning item, subject to the actual finding and applicable limits.
- Acceptable condition: The tested or inspected area showed no present concern within the stated inspection limits.
Color can help scanning, but color alone isn't a diagnosis. The customer needs a plain-language note, a measured value when relevant, a photo or scan result when available, and a clear answer to “What happens if this waits?” The answer should reflect the actual condition, not a sales script.
A structured checklist also protects the shop from two opposite failures. A vague report may miss a safety-critical observation or leave the customer confused. An alarmist report may treat every maintenance recommendation as an emergency. The better approach separates urgency from importance and explains what the technician knows, what wasn't tested, and what should happen next.
Make approval and follow-up part of the inspection
The report shouldn't end when the customer receives it. Record whether the customer approved, declined, deferred, or requested more diagnosis. When the repair is completed, attach the final result to the same finding. This creates a vehicle-history trail that can show a recurring issue, a resolved defect, or a condition that changed after more driving.
Digital adoption requires more than putting a paper form on a phone. A survey of 300 shop owners and service managers found that 43% of automotive repair facilities used digital inspection sheets, while 47% used online appointment and scheduling systems, according to the. Those figures show an implementation gap, but a shop should measure its own completion rate, inspection-to-estimate conversion, and customer-view rate rather than assume that a digital form is working.
A useful digital workflow can require checklist completion before an estimate is finalized. Mandatory fields may include tire tread depth, brake-pad thickness, battery test results, fluid condition, warning lights, and OBD-II findings. Offline capability, VIN-linked history, mobile photos, customer delivery, and configurable templates reduce friction, while dashboards can reveal whether one technician consistently skips brake or tire measurements.
A thorough checklist commonly spans 30 to 80 inspection points across six technical domains, fluids and filters, brakes, tires and wheels, electrical and lighting, suspension and steering, and belts and hoses, according to the. More points aren't automatically better. The useful checklist is the one technicians complete accurately, customers understand, and managers can audit.
The safety rationale is clear, but it needs careful wording. Vehicle component failure is estimated to contribute to approximately 2% to 7% of U.S. crashes, and the reported that more than 529,000 vehicles, about 20% of all vehicles inspected in one state, failed inspection and required repairs before passing. The same review identified brakes, tires, wheels, steering, and lighting as systems relevant to safety evaluation, while cautioning that available studies hadn't established a statistically significant nationwide effect of inspection programs on injury or fatality crashes.
That means a multi point inspection checklist is best presented as a risk-identification and communication tool. It creates a repeatable review, documents defects, separates urgent findings from routine maintenance, and gives the customer evidence. It doesn't guarantee that a vehicle is free from every hidden fault.
Inspection data can also guide shop improvement. Missouri State Highway Patrol statistics report that approximately 19% of inspected vehicles have at least one defect, while an earlier annual estimate placed defects requiring correction at 16% to 17%. A separate roadside-inspection analysis associated brakes with about 15% of reported defects, tires, steering, and other systems with roughly 10% to 12%, and lights with approximately 5%, as detailed in the. These figures don't predict what every shop will find, but they support systematic coverage of safety-critical categories.
RedAppy can support this routine with digital inspection reports, categorized findings, photos and videos, customer sharing, estimates, invoicing, vehicle history, and shop workflow tools. Its example inspection covers areas including tires, engine, wheels, brake pads, tire tread, and the serpentine belt. Shops can review RedAppy's features to see how digital inspections and instant estimates fit into the repair process, or contact the RedAppy team about the workflow.
The strongest routine is simple. Run the eight checkpoints in the same order, record what was tested, attach evidence while the vehicle is in the bay, assign one of the three severity levels, and write the customer note before the vehicle leaves. That process gives technicians a usable inspection tool and gives customers a report they can understand and act on.
RedAppy helps repair shops turn a multi point inspection checklist into digital reports with photos, videos, categorized findings, estimates, invoices, and vehicle history. Visit RedAppy to review the platform and choose a clearer workflow for inspections, approvals, and follow-up.
Ready to Transform Your Shop?
RedAppy helps auto repair shops create professional digital estimates with photos and videos, send them instantly via text or email, and get customer approvals in seconds. No credit card required to start.