
Safely Remove Decal from Car
A service advisor has seen this one before. A customer pulls in with a clean late-model vehicle, but the rear badge area still has a faded dealer sticker, or the quarter panel carries an old vinyl graphic that's cracked, chalky, and half-lifted at the edges. The customer wants it gone, but also wants the paint to look untouched when the job is done.
That request sounds simple until a tech rushes it. One bad pull, one overheated spot, or one metal edge in the wrong place can turn a quick add-on service into clear coat damage, a comeback, and an awkward conversation at the counter. Shops that handle decal removal well don't treat it like peeling off packaging. They treat it like paintwork.
For shops, that's where this job gets interesting. Decal removal has low tool overhead, fits naturally alongside detailing, reconditioning, body prep, and trade-in cleanup, and gives service teams an easy way to solve a visible customer complaint fast. The difference between profitable work and risky work comes down to method, not muscle.
Table of Contents
- That Old Decal Has to Go
- Gathering Your Tools for a Clean Removal
- The Safe Decal Heating and Peeling Method
- Cleaning Up Stubborn Adhesive Residue
- Restoring the Finish and Protecting Your Paint
- Adding Decal Removal to Your Shop's Services
That Old Decal Has to Go
A neglected decal changes how a vehicle presents. It can make a clean car look tired, suggest old ownership, or leave the impression that prior work was never finished. On trade-ins and customer vehicles alike, that small patch of vinyl often draws more attention than larger panels that are in better shape.
Shops run into a few versions of the same problem. Sometimes it's a dealer sticker on fresh paint that should come off cleanly if handled right. Sometimes it's an old bumper sticker that has baked into the panel and breaks into tiny pieces as soon as someone touches it. The worst version is the one a hurried tech already started, where half the vinyl is gone and the rest is glued down harder than before.
A decal job is rarely ruined by the adhesive alone. It's usually ruined by impatience.
Customers usually worry about three things. They don't want scratches, they don't want sticky residue, and they don't want that ghost outline left behind where the surrounding paint has aged differently. Those concerns are valid. A decal shields the surface below it, and the surrounding panel may not match perfectly right away even if the removal itself is flawless.
For a professional shop, the standard isn't just getting the sticker off. The standard is making the panel look intentional again. That means controlled heat, the right lifting tool, careful residue cleanup, and a finish step that blends the area back into the rest of the vehicle. When a shop knows how to remove decal from car paint safely, the result looks routine to the customer. That smooth result is what protects margins and reputation.
Gathering Your Tools for a Clean Removal
A clean decal removal job starts before the first corner lifts. If a tech reaches for whatever is nearby, the process gets sloppy fast. The right setup prevents improvisation, and improvisation is what usually scratches paint.
Build a kit before the vehicle enters the bay
A dedicated decal-removal cart keeps the job predictable. That matters in a busy shop where one tech may start the removal and another may finish adhesive cleanup later. Every tool should be chosen for a reason, not because it happened to be close.
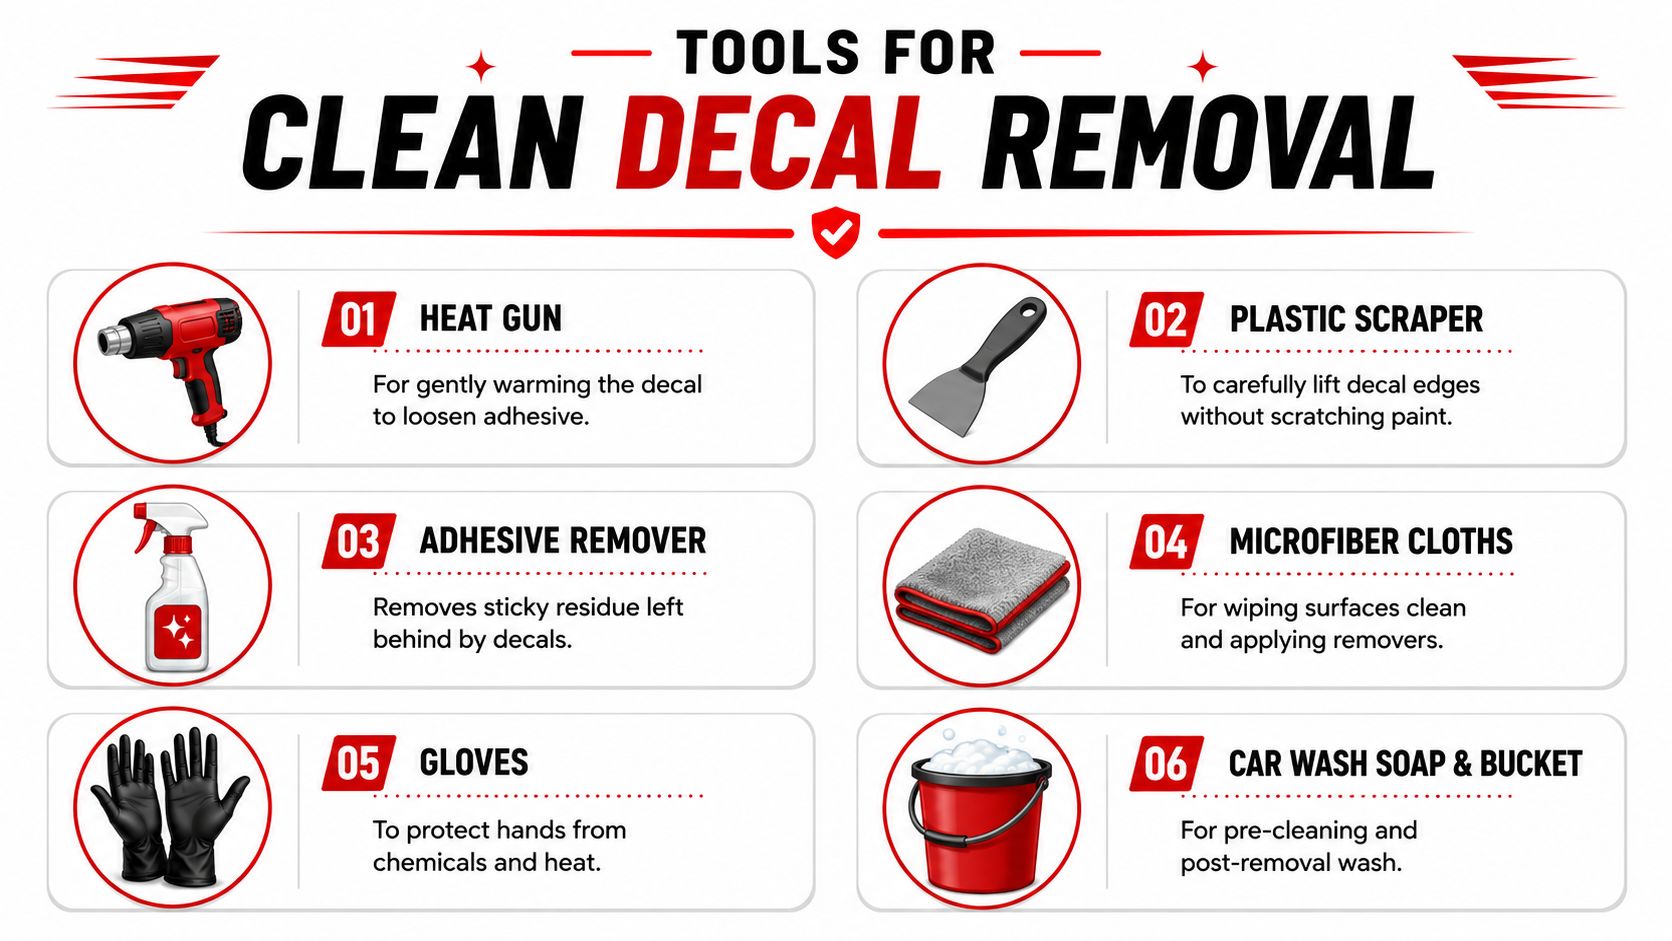
The first decision is heat source. A hair dryer is slower but forgiving, which makes it useful for lighter work or less experienced techs. A heat gun on a low setting works faster, but only when the operator keeps it moving and respects panel sensitivity. Both can work. What doesn't work is parking intense heat on one spot and hoping the adhesive lets go before the finish suffers.
What belongs in the cart every time
A reliable kit usually includes:
- Heat source. Hair dryer for gentler warming, or a heat gun set low for faster production work.
- Plastic razor blades or a plastic putty knife. These lift edges without digging into paint. Metal tools don't belong on painted panels.
- Microfiber towels. One set for chemical work, another clean set for final wipe-down and protection steps.
- Rubbing alcohol. Useful for residue cleanup and final surface prep.
- Warm water and dish soap. A simple option that helps break down lighter adhesive residue.
- White vinegar. Handy when a shop wants a milder alternative during glue softening.
- Gloves. Good techs protect their hands before handling heat and solvents.
- Car wash soap and bucket. Dirt trapped under a towel or scraper can mark the panel before the decal even starts lifting.
A few extra items make difficult jobs easier:
| Tool | Best use | Why it matters |
|---|---|---|
| Credit card or plastic card | Starting a lifted edge | Flexible and less aggressive than a rigid scraper |
| Plastic trim tool | Tight corners or badges nearby | Better control around contours |
| Inspection light | Spotting remaining glue film | Adhesive often hides until the panel is viewed at an angle |
| Light polish and protection product | Final blending | The removal isn't finished when the vinyl is gone |
Practical rule: If a tool can gouge paint, crack trim, or leave a sharp line in soft clear coat, it shouldn't be in the tech's hand during decal removal.
This prep stage is where shops separate professional process from driveway trial-and-error. A customer won't see the cart. The customer will see the result it makes possible.
The Safe Decal Heating and Peeling Method
The removal itself is where most avoidable damage happens. Shops that get repeatable results follow a thermal routine, not guesswork. Heat softens the decal and changes how the adhesive releases. Skip that step and the peel becomes a fight.
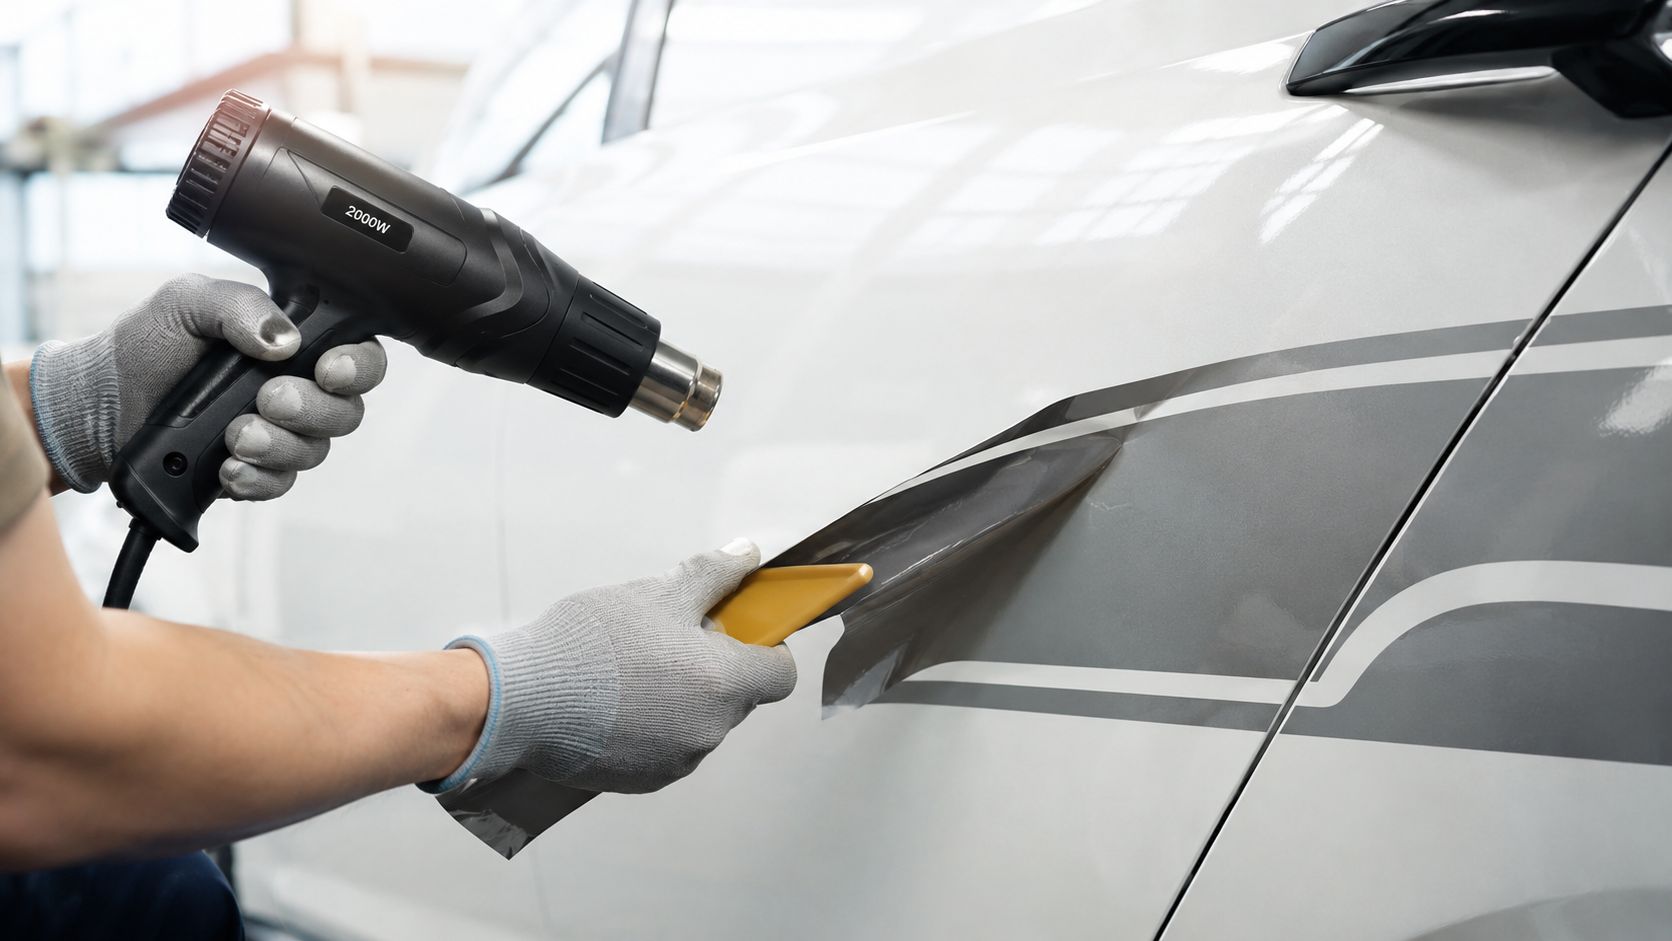
Heat first, always
The most important step in the whole job is heat application before peeling. Professional detailers identify skipping that step as the leading cause of paint damage. Warming the decal with a heat gun or hair dryer for 30 to 60 seconds from six to eight inches away softens the adhesive so the vinyl can lift cleanly, and the vinyl cools quickly, so heat needs to be reapplied to maintain a smooth removal at a 15 to 30-degree angle, according to.
A second reference from adds another useful shop detail. It recommends low, even heat at 50 to 70°C surface temperature and notes that peeling should be done slowly with a side-to-side motion rather than yanking straight up. That same guidance warns against metal tools and points techs toward a plastic razor blade, credit card, or plastic putty knife when an edge won't start cleanly.
There isn't much mystery in what proper heat looks like. The vinyl becomes more flexible. The edge lifts without whitening, snapping, or shattering. The adhesive gives with a smooth drag instead of a harsh, gritty resistance.
How the peel should look and feel
A controlled peel usually follows this sequence:
- Warm the decal evenly. Move the heat source constantly. Don't camp on one corner.
- Start one edge with plastic only. Fingernail, plastic razor, or plastic card. Nothing metal.
- Pull low and across the panel. Keep the angle shallow rather than lifting up hard.
- Reheat often. If the vinyl cools, resistance rises fast.
- Slow down when the decal narrows. Thin sections tear first.
When the release is going well, the decal often lifts in a broad sheet. When it's going badly, it stretches, tears, and leaves adhesive behind in a rough pattern. That rough pattern usually means the material cooled too much, the pull angle got too steep, or the tech got aggressive trying to save time.
For teams that also handle marine graphics, some of the same care principles carry over. Boat surfaces introduce their own finish concerns, and are useful for understanding how controlled heat and patient peeling matter when the substrate can't be treated casually.
When the decal starts fighting back
Not every decal comes off in one clean pass. Aged vinyl becomes brittle. Cracked edges break apart. Sun-baked material may release in flakes rather than strips. When that happens, the answer isn't more force.
Use short heat cycles, lift a fresh edge, and work small sections. If the film tears, keep the pull low and return to the surrounding area rather than attacking the torn spot straight on. A plastic blade can help nudge an edge up, but it should glide, not scrape.
Some surfaces deserve extra caution. Modern thin clear coats, delicate matte finishes, and wrap-adjacent panels don't give much margin for sloppy heat use. General DIY guides often miss these surface-specific risks, even though trade discussions point out that older decals can leave a crusty adhesive layer that demands much more care on delicate finishes. That gap matters in a professional setting because a wrong move on matte or soft-finish surfaces can create texture change, haze, or visible marks that won't polish out cleanly.
If the decal won't release with controlled heat and a shallow pull, the process needs adjustment. More force usually makes the repair bill bigger.
A good tech doesn't judge the job by how fast the first edge lifts. The key measure is whether the panel still looks healthy after the last piece is gone.
Cleaning Up Stubborn Adhesive Residue
Getting the vinyl off doesn't mean the work is over. Adhesive residue is where many jobs lose time and profit. The glue can sit as a thin smear, a tacky film, or a hard crust that feels almost fused to the surface.
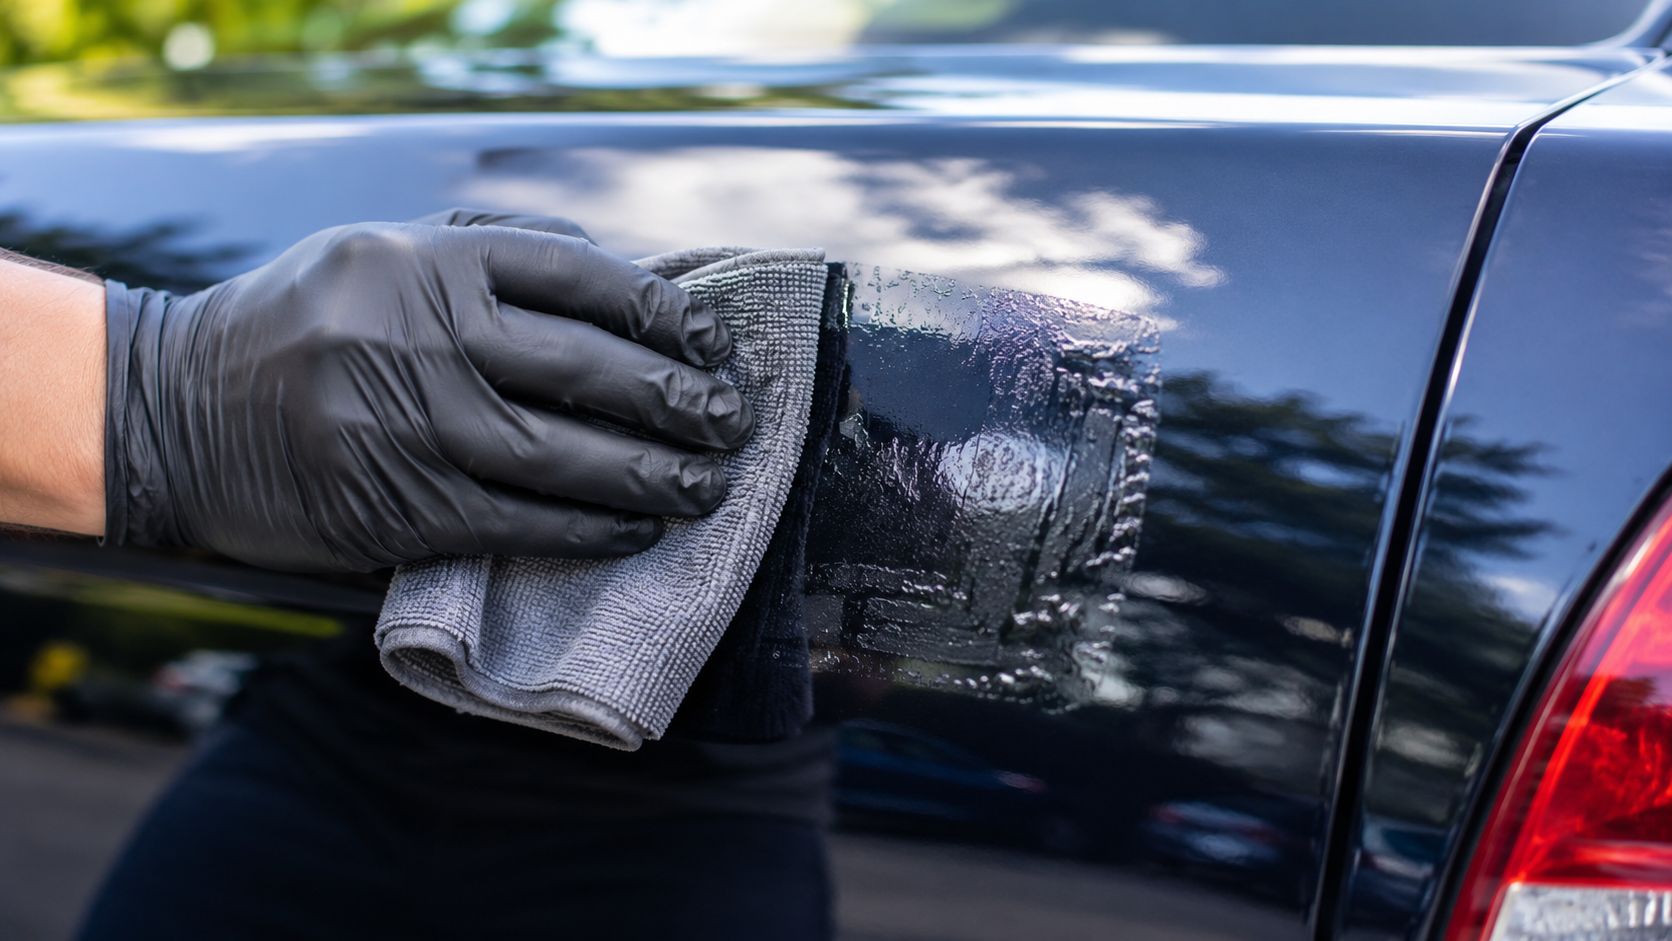
Choose the mildest option that works
Not every residue patch needs the strongest chemical on the shelf. On painted surfaces, safer choices usually deserve the first attempt. If adhesive residue is stubborn, rubbing alcohol or a mix of warm water and dish soap can break down the bond, and soaking the area with white vinegar for 60 to 90 seconds before peeling can also work as a natural alternative, as noted in.
That gives shops a simple decision path:
| Residue condition | First choice | Why start there |
|---|---|---|
| Light smear | Warm water and dish soap | Low risk and easy cleanup |
| Sticky film | Rubbing alcohol | Cuts residue without jumping straight to harsher products |
| Dry or stubborn edge buildup | White vinegar dwell, then wipe | Useful when a slower, milder approach is preferred |
The important part isn't just product choice. It's dwell time and control. A towel dampened with product and held on the area usually works better than frantic rubbing. Let the chemistry do part of the job, then wipe with a clean microfiber. If needed, repeat instead of grinding harder.
Residue removal should feel like softening and lifting, not sanding with a towel.
How to handle thick or crusty glue
Older decals can leave behind adhesive that feels rough, layered, or almost flaky. That kind of residue often needs a combination of chemical softening and gentle mechanical help. Start with the mildest cleaner, give it time to work, then use a plastic razor blade to lift softened material. The blade should stay flat to the panel, and the motion should be short and careful.
A few habits keep this phase safe:
- Test first. Any chemical should be tried on an inconspicuous area before broad use.
- Change towels often. A loaded towel just smears dissolved adhesive around.
- Keep the panel clean. Dirt mixed into softened glue can scratch.
- Avoid panic tools. Metal scrapers may feel efficient, but they turn residue cleanup into paint correction.
This is also where surface type matters. Glass is more forgiving than paint, but even then a shop can't treat every window the same. Defroster areas and surrounding trim deserve restraint. Painted body panels need the most discipline because glue removal often involves repeated contact, wiping, and edge work in one small area.
For a shop trying to remove decal from car paint cleanly, residue control is what turns a passable job into a professional one. Customers don't usually inspect the peel. They inspect the patch of paint left behind.
Restoring the Finish and Protecting Your Paint
A decal can come off perfectly and the panel can still look wrong. That's not always because the tech missed something. The paint under the decal has been shielded while the surrounding paint has faced washing, weather, and daily exposure. The difference may show up as a cleaner patch, a sharper gloss line, or a faint outline.
Why the panel still looks off after removal
This is the part customers often misread as damage. In many cases, it isn't damage from removal. It's contrast. The covered paint and the exposed paint have aged differently.
That doesn't mean a shop should hand the vehicle back and call it done. A light polishing step can help blend the area visually, reduce minor haze from cleanup, and make any remaining edge trace far less obvious. The goal isn't heavy correction. The goal is to even the look of the panel.
Finish the job like a professional
A simple restoration sequence works well:
- Wash the area again. Remove any remaining chemical film before polishing.
- Use a light polish if needed. Keep the approach conservative, especially on sensitive finishes.
- Inspect under good lighting. Ghosting often appears only at an angle.
- Apply wax or sealant. Protection should be restored across the worked area.
The protection step matters because the panel has just been exposed to heat, cleaning agents, wiping pressure, and possibly light polishing. A final protective layer helps bring back a uniform finish and gives the customer a sense that the work is complete, not interrupted halfway through.
A shop that stops at vinyl removal is only doing extraction. A shop that restores gloss and protection is delivering a finished service. That's the standard customers remember, and it's the standard that keeps decal removal from feeling like small side work.
Adding Decal Removal to Your Shop's Services
For many shops, decal removal starts as a courtesy. A customer asks if the team can get rid of an old dealer sticker while the car is in for service. Then the same request shows up again during used-car prep, before body work, after a purchase, or before a ceramic coating job. At that point, it stops being a favor and becomes a real service line.

Price the work by risk, not by sticker size
A small sticker can be harder than a large one. Age, brittleness, panel location, residue behavior, and finish sensitivity matter more than simple dimensions. Real-world shop discussion places dealership sticker removal in the $20 to $50 range for a single sticker, with older hardened decals justifying higher charges because they take more labor and solvent work to remove safely, based on.
That pricing range makes sense because the service isn't just peeling. It includes three labor components: loosening the bond, removing the film, and cleaning the adhesive. Paint-safe work also carries a higher skill burden than glass work, where more aggressive methods may be acceptable.
A useful estimate should account for:
- Surface type. Painted panel, glass, trim-adjacent area, or delicate finish.
- Decal condition. Fresh and pliable, cracked, brittle, or residue-heavy.
- Cleanup load. Light adhesive film versus hardened glue.
- Finish expectations. Basic removal only, or removal plus polish and protection.
Trouble cases that separate skilled shops from careless ones
Some decal jobs don't fit the usual heat-and-peel routine. Matte finishes deserve a very cautious approach because heat can alter appearance in ways that a standard polish won't correct. Painted-over or oversprayed decals are another category entirely. In those cases, the shop isn't just breaking an adhesive bond. It may be dealing with a paint layer over the graphic, which changes the risk and the customer conversation.
Trade discussions also show that older decals can leave crusty residue, and generic online advice often doesn't address surface-specific limits on modern finishes. That matters for profitability. Jobs with unclear risk should be inspected carefully, photographed, and approved with clear expectations before a tech starts.
Shops that also remove protective films can borrow some decision-making logic from adjacent services. are worth reviewing because they reinforce a familiar shop truth. Film removal gets expensive when the surface, adhesive age, and pull technique aren't evaluated up front.
Hard removals shouldn't be sold as quick removals. The estimate needs to match the risk.
Run the service like a process, not a favor
The shops that make money on small services usually standardize them. Decal removal benefits from the same structure:
- Check in the vehicle with photos. Capture decal condition and panel location.
- Note finish type and surrounding trim. This prevents careless tool choice later.
- Approve the estimate before work starts. Especially important for older decals and edge cases.
- Assign the job visibly. Removal stalls when it's treated like side work between larger tickets.
- Document completion. A clean after photo helps close the loop with the customer.
When that workflow is organized, decal removal fits neatly into reconditioning, detail upsells, collision prep, and customer-pay cosmetic work. It becomes easier to schedule, easier to estimate, and easier to hand off between advisor and tech without missed details.
For shop owners who want tighter control over those handoffs, faster estimates, better job visibility, and clearer customer communication, it's worth taking a look at RedAppy's shop management features or reaching out through the RedAppy contact page. A platform that keeps photos, approvals, workflow stages, and invoicing in one place can make even small add-on services easier to run profitably.
Ready to Transform Your Shop?
RedAppy helps auto repair shops create professional digital estimates with photos and videos, send them instantly via text or email, and get customer approvals in seconds. No credit card required to start.