
Crank No Start Diagnosis: A Shop-Proven Workflow
A vehicle rolls in after a tow. The starter sounds strong, the engine turns over cleanly, and nothing catches. That moment wastes more shop time than it should, usually because someone jumps straight to parts instead of proving what's missing.
A proper crank no start diagnosis is a narrowing process. The fast shops separate the complaint, verify the basics in the right order, and document enough evidence to get approval before teardown starts. That keeps the bay moving and keeps the estimate honest.
Table of Contents
- What a Crank No Start Diagnosis Really Means
- Setting Up the Bay and Separating the Complaint
- Proving Cranking Voltage and Battery Health First
- Testing Fuel Delivery Before Chasing Spark
- Verifying Ignition and Injector Pulse
- The Often-Missed Immobilizer and Post-Repair Checks
- Tools, Workflow Recap, and Shop Process
What a Crank No Start Diagnosis Really Means
A tow-in hits the bay, the starter spins the engine at normal speed, and the cylinders never light. That is a true crank no start diagnosis. The engine is turning. Combustion is not happening.
That distinction matters for shop time. If the engine cranks normally, the job is no longer about starter control or basic battery engagement. It becomes an elimination job. The fastest path is to identify which requirement for startup is missing, then document that proof cleanly enough to get customer approval before anyone starts pulling parts.
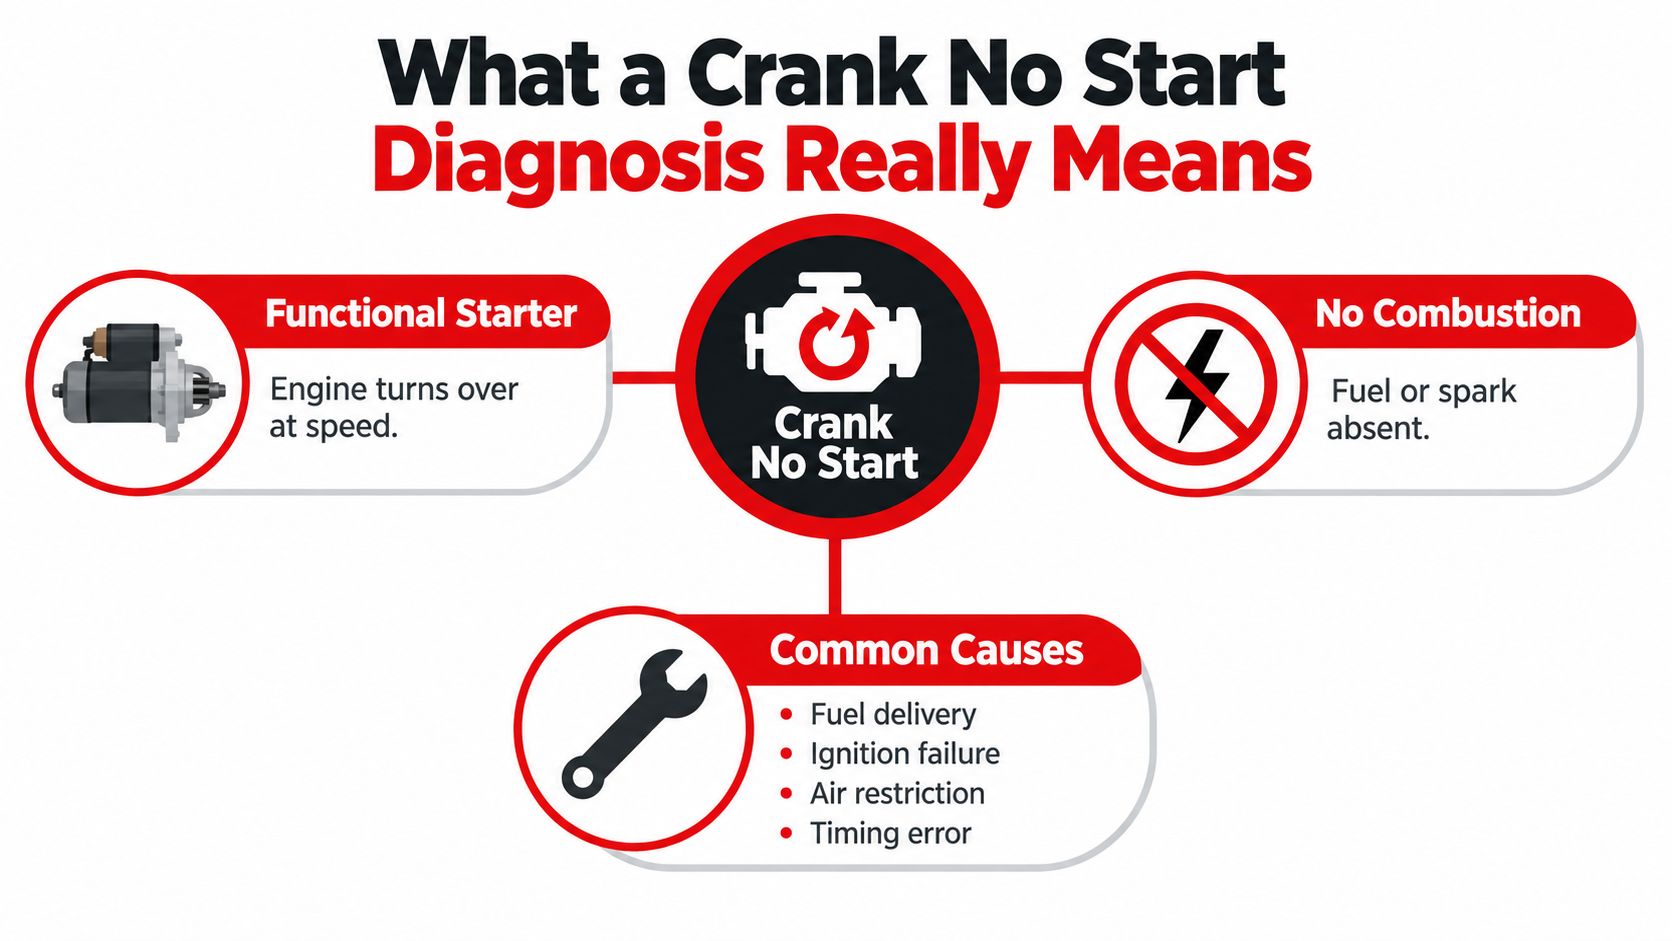
The problem is usually simple. The workflow is where shops win or lose time.
An engine that cranks and will not start is missing one of the basics. Fuel. Spark. Compression. Correct valve timing. On newer vehicles, authorization belongs on that list too. If the immobilizer does not allow injector or ignition operation, the engine can crank all day and never fire.
ALLDATA lays out that foundation clearly in its. A practical field summary makes the same separation between crank-no-start and other no-start complaints in this.
The mistake that burns labor is chasing the loudest clue instead of the missing input. A strong cranking sound does not prove the battery is supporting the modules correctly. Fuel pump noise does not prove pressure. A recent sensor code does not prove that sensor is the reason the engine will not run.
A good diagnosis proves absence before it suggests parts
In a productive bay, the first question is not which part to sell. The first question is which system failed to show up. That keeps the estimate honest and keeps the car from tying up a stall on guesses.
The core checks are straightforward:
- Fuel delivery must be verified with pressure, flow, or scan data that supports the conclusion.
- Ignition output has to be checked with a real spark tester.
- Injector pulse needs confirmation with a noid light or scope.
- Mechanical condition has to stay on the table early, especially if cranking speed sounds uneven or the engine has a timing history.
- Security authorization should be checked before teardown on late-model vehicles, because an immobilizer fault can mimic bigger problems and wastes the most time when it gets missed.
Older no-start trees pointed technicians toward fuel, spark, and mechanical failure first. That still holds. What changed is speed. A scan tool, scope, and digital inspection photos let a shop prove the direction fast, attach evidence to the ticket, and get approval for deeper testing without a long back-and-forth at the counter.
That is what a crank-no-start diagnosis really means in practice. Find what is missing, prove it in the right order, and avoid turning a one-hour answer into a half-day parts chase.
Setting Up the Bay and Separating the Complaint
Before any meter leads come out, the bay needs to be controlled. Chock the wheels. Confirm Park or Neutral. Set the parking brake. Keep the key fob away from the vehicle if remote functions could interfere with testing.
That sounds basic, but sloppy setup creates false symptoms. A range switch issue, a proximity key problem, or an accidental mode change can send a tech chasing a fault that isn't in the engine at all.
Confirm the complaint exactly as the customer describes it
A lot of bad diagnosis starts with a bad translation at the counter. “Won't start” can mean four different things.
- No crank: The starter never turns the engine.
- Slow crank: The engine turns, but drags.
- Crank no start: The engine turns normally and never lights off.
- Starts and dies: The engine catches, then quits.
Those aren't close cousins. They're different trees with different first tests.
Do the quick sweep before the deep dive
A fast visual check still pays off. Shops lose time when they skip obvious failures and go straight to a scan tool.
Look for simple misses such as:
- Fuel level problems: The gauge may be wrong, or the car may be out of fuel.
- Battery connection issues: Loose or dirty terminals can mimic a deeper electrical fault.
- Unplugged air metering parts: A disconnected MAF or intake duct left loose after prior work can create a no-start or a hard start.
- Recent repair leftovers: Vacuum lines, ground straps, and sensor connectors often tell the story before data does.
A crank no start complaint after recent work deserves suspicion before sympathy. Something may have been left disconnected, reset, or disturbed.
Document the basics while the complaint is fresh. Note the odometer reading, the temperature conditions, and whether the vehicle was recently jump-started, had battery service, or came from another shop. That context often explains why the problem showed up now.
Proving Cranking Voltage and Battery Health First
A starter that sounds normal can still waste half the bay if cranking voltage is poor. The engine may turn over, but the PCM, injectors, coils, and security system still need stable voltage and believable cranking speed before any fuel or ignition test means much.
This is one of the fastest elimination steps in the whole workflow. It also protects shop efficiency. If the battery is weak or the cables are dropping voltage, every test that follows gets muddy, and the estimate gets harder to sell because the fault path never looks clean on the inspection.
What to check during cranking
Check battery voltage at the posts, not the terminals. A dirty or loose connection can hide in plain sight if the leads are clipped to the cable ends.
Then watch two things at the same time:
- Cranking voltage under load
- Scan-tool cranking RPM
If voltage falls hard or RPM is lower than expected, stop there and sort that out first. Low cranking speed can suppress injector operation, weaken spark output, skew sensor signals, and trigger false suspicion around fuel delivery. On some vehicles, it can also blur the line between a low-voltage issue and an immobilizer problem, which is why this check belongs near the front of the order.
| Parameter | Healthy | Marginal | Failing |
|---|---|---|---|
| Battery voltage during crank | Holds steady under load | Drops enough to require confirmation with cable and starter checks | Collapses under load and points to battery, connection, or starter trouble |
| Scan-tool cranking RPM | Stable and believable for the engine | Lower than expected or inconsistent | So low or erratic that fuel and ignition results are unreliable |
| Starter draw pattern | Even and repeatable | Borderline, intermittent, or heat-sensitive | Excessive or unstable, suggesting starter or high-resistance cable issues |
Bay routine that saves time
Use a simple order and stick to it.
- Measure at the posts first. That proves battery output before chasing a connection problem.
- Use min-max capture. Cranking voltage drops happen fast, and a missed low point sends the job sideways.
- Cross-check scan RPM. If the engine is dragging, the rest of the diagnosis is already compromised.
- Add a voltage-drop test on the main cables if needed. A battery can pass and still crank poorly through bad connections.
A digital inspection report helps here. A screenshot of low cranking voltage or weak RPM gives the advisor something concrete to show the customer before anyone talks about battery replacement, cable repair, or starter removal. That usually gets approval faster than a verbal description of "it seems to crank slow."
For newer techs who need a refresher on battery construction and behavior before load testing, this is a useful primer because it explains the basics behind the lead-acid batteries still found in many vehicles and shop support tools.
Why this step belongs early
Weak cranking creates false leads. Fuel pump sound becomes a distraction. Injector pulse can look inconsistent. Ignition output can appear weak when the problem is available voltage during crank.
Prove battery health, cable integrity, and usable cranking speed first. That keeps the no-start workflow clean, shortens time to approval, and prevents teardown before the electrical foundation is proven.
Testing Fuel Delivery Before Chasing Spark
A car gets pushed into the bay after another shop already sold a crank sensor quote. It still cranks, still will not start, and nobody has put a gauge on it. That is how time gets burned.
Fuel delivery needs proof early in the elimination order, right after cranking voltage is known good and before ignition parts start coming off. A pump noise at key-on does not confirm pressure at the rail. Rail pressure alone does not confirm the engine is getting enough fuel during crank.
One practical approach is to connect a fuel pressure gauge at the Schrader valve, or read fuel rail pressure data if the system supports it, then compare the result to the vehicle spec in this fuel pressure diagnostic article. In the shop, I still prefer a mechanical gauge when access is easy. It removes doubt fast.
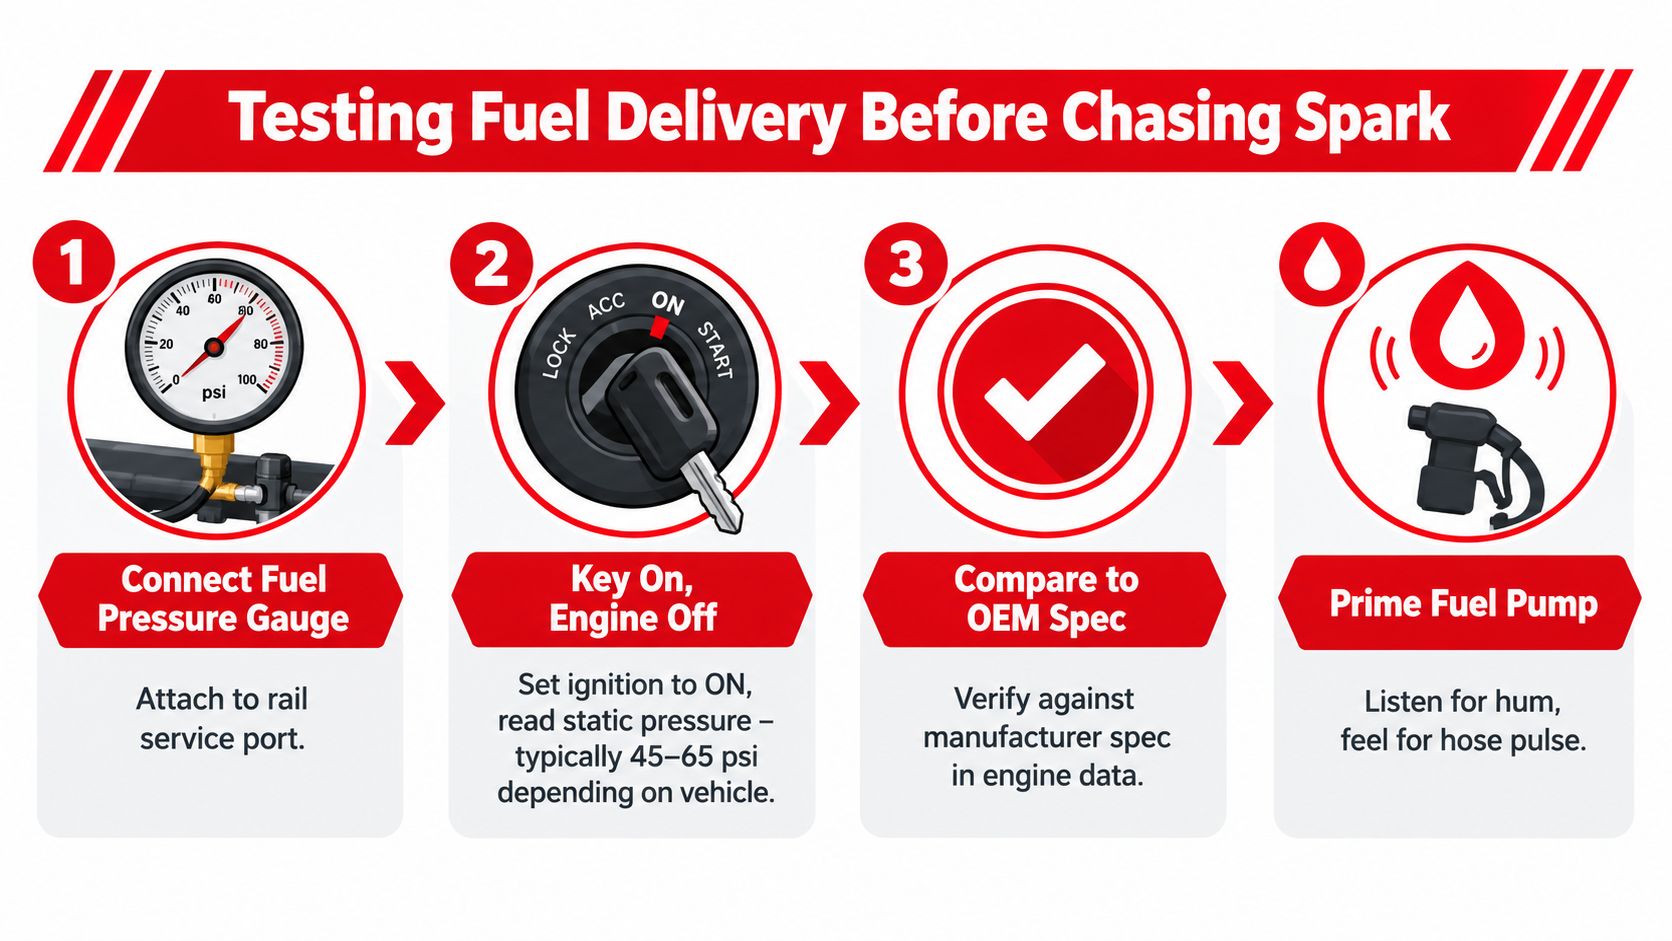
Start with pressure, then check whether the system can keep up
Use a sequence that closes doors instead of opening more guesses:
- Hook up the gauge with the correct adapter: Bad connections and leaking adapters waste time and mislead the test.
- Check key-on pressure and cranking pressure: Compare both to spec. Some systems hit target at key-on but drop too far once the engine is cranking.
- Watch pressure bleed-down after the pump stops: A fast drop can point to an injector leaking, a weak regulator, or a pump check valve issue.
- Verify the pump can move fuel, not just make pressure: If published volume spec is missing, use the general guideline noted earlier and compare what the pump delivers against a known-good expectation.
- Confirm injector command before condemning the fuel side: A noid light or scope check keeps you from selling a pump on a control problem.
That order matters for shop efficiency. A pressure reading, a bleed-down result, and a quick capture of rail pressure data can go straight into a digital inspection report. The advisor now has something concrete to show the customer before anyone starts talking about tank removal, pump module access, or intake teardown.
The auxiliary-fuel check still saves time
A brief auxiliary-fuel test can separate a fuel delivery problem from everything else in one crank event.
If the engine starts and dies on the added fuel, stay on the fuel path. Check pump output, injector delivery, and pressure under crank. If the engine does nothing different, stop chasing the pump just because the symptom sounds fuel-related. On late-model vehicles, that is also the point where I want immobilizer status in view, because authorization problems can mimic a dead fuel system and waste half the morning.
Where shops lose hours
The common mistake is checking for spark first because a coil is easy to reach. The better move is to prove the engine has usable fuel supply and actual injector command before parts start getting swapped.
Pressure-only diagnosis causes trouble too. A weak pump can show acceptable static pressure and still fall flat when volume demand rises during crank. The no-start stays the same, but the fix changes completely.
Handle fuel testing as both a delivery test and a command test. That keeps the workflow tight, shortens approval time, and prevents deeper teardown before the basic facts are on paper.
Verifying Ignition and Injector Pulse
The car is in your bay, fuel pressure is already verified, and the temptation is to grab a coil, swap parts, and hope the engine gives you a clue. That is where shops lose time. At this stage, the job is to prove whether the PCM is commanding spark and injector pulse, then decide if the fault is in control, power supply, or engine mechanics.
Use a proper wide-gap spark tester. A plug laid on the valve cover can show spark in open air and still miss under compression. Check an easy-to-reach cylinder first, make sure the tester is grounded correctly, and watch for a strong, repeatable spark through the full crank event.
Then check injector pulse with a noid light or scope.
Running those two tests together tightens the elimination order and keeps the estimate honest. If both are missing, do not jump straight to coils or injectors. Look at shared inputs first, especially crank and cam signals, ignition feed, PCM power and ground, and any theft-deterrent status the scan tool can show. That is also the point where a quick screenshot in your digital inspection helps the advisor get approval for deeper electrical or timing diagnosis before the bay gets tied up.
| Observed Result | Most Likely Cause |
|---|---|
| No spark and no injector pulse | Crank signal loss, missing power or ground, wiring fault, PCM input problem, or start authorization lockout |
| Strong spark but no injector pulse | Injector circuit fault, injector feed issue, PCM driver problem, or command being inhibited |
| Injector pulse present but no spark | Coil fault, ignition driver issue, failed trigger, or related wiring fault |
| Spark and pulse both present, still no start | Mechanical timing problem, low compression, flooded engine, or fuel pressure and volume issue under crank |
Coil swaps still have a place, but only on an isolated cylinder fault. On a full crank-no-start, random swapping burns minutes and muddies the story. A scope usually gets to the answer faster if the pattern is inconsistent or one signal drops out during crank.
Pay attention to signal quality, not just signal presence. A crank sensor pattern that cuts in and out can mimic a bad ignition system. A weak cam signal can throw off synchronization and leave you chasing the wrong circuit. If spark and pulse show up clean but the engine still does nothing, stop pushing deeper into electrical parts and start questioning valve timing, compression, and engine condition.
Keep the sequence tight:
- Check spark with a wide-gap tester.
- Verify injector pulse with a noid light or scope.
- Check cam and crank waveforms if either command is missing, erratic, or drops out during cranking.
- Load-test power and ground circuits before calling a module bad.
That order protects shop time. It also gives the customer clear proof of what has been ruled out before teardown or module replacement gets discussed.
The Often-Missed Immobilizer and Post-Repair Checks
A surprising number of crank-no-start complaints aren't missing fuel or spark in the classic sense. The control system isn't allowing the engine to start.
Current guidance often tells techs to check the security light, key behavior, recent battery changes, and whether the car starts in Neutral, which makes immobilizer and interlock faults an important early branch in the. That path deserves more attention than it usually gets.
Security faults can mimic bigger failures
A vehicle may crank normally and still have fuel or spark disabled by theft deterrent logic. That's why the cluster matters. A flashing key icon, odd push-button behavior, or a complaint that started right after battery service should move security checks near the front of the line.
Common misses include:
- Key recognition faults: Especially after battery replacement or key damage.
- Range switch issues: The engine may crank differently in Park and Neutral.
- Post-repair resets: Module relearn needs can create a no-start that looks mechanical.
- Low fob battery behavior: On some push-button systems, the symptom looks like a deeper control fault.
For shops that also handle security hardware, telematics, or fleet-related immobilizer questions, this guide to is helpful background on how immobiliser setups affect vehicle access and control logic.
Don't close the job without proving the repair
Once the root cause is fixed, verify the engine mechanically if the symptom pointed that way. Compression testing and leak-down checks still matter when timing or cylinder sealing is in question.
Then clear codes, verify start quality, and watch for returning faults. That last step protects the shop. A vehicle that starts once in the bay is not automatically repaired. It has to prove itself under repeat starts and normal operating conditions.
Tools, Workflow Recap, and Shop Process
The shops that solve these complaints quickly don't necessarily use more tools. They use the right tools in the right order and attach the results to the work order.
A complete crank no start setup should include a digital multimeter with min-max capture, a DC inductive clamp for starter draw, a scan tool that can read live PIDs and engine RPM, a fuel pressure gauge kit, noid lights, a wide-gap spark tester, a graphing meter or lab scope, a hand vacuum pump, a compression tester, and a borescope.
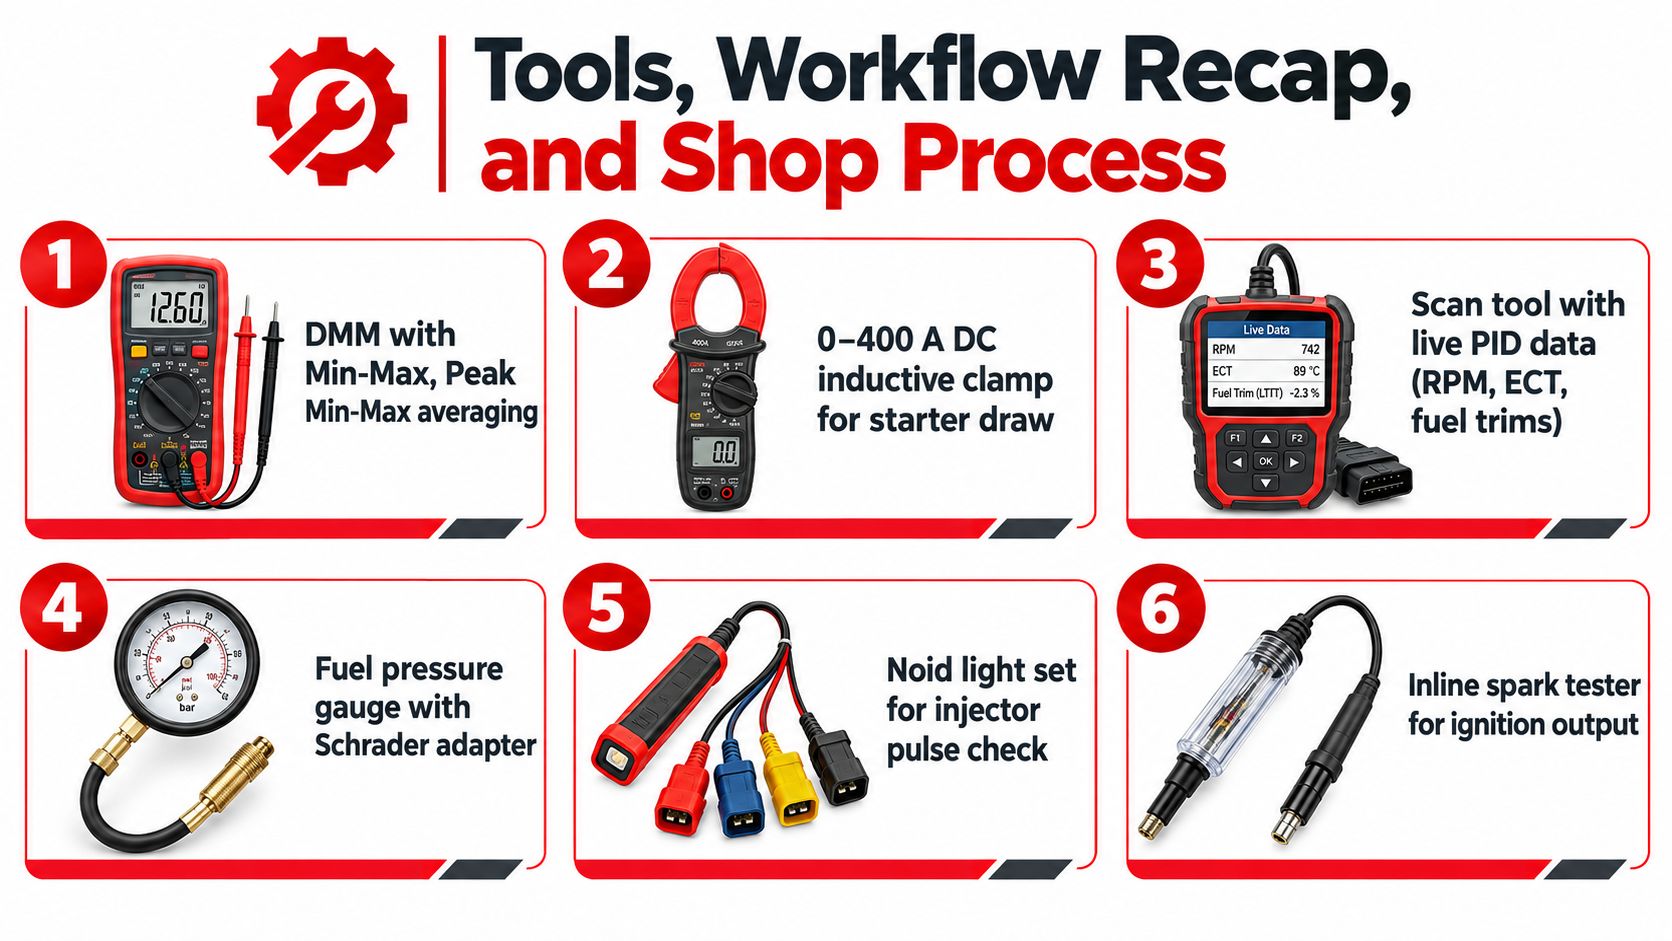
The elimination order that keeps bays moving
When the complaint is confirmed, the shortest practical order is:
- Security and immobilizer checks first: Especially after recent battery or module work.
- Battery and cranking health next: Bad crank quality poisons the rest of the test results.
- Fuel pressure and volume after that: Because pump noise proves nothing.
- Spark and injector pulse after fuel is verified: This isolates command versus delivery.
- Mechanical timing and compression last: Once the electrical and fuel basics are proven.
One guide also notes that a PicoScope-based relative compression test takes about 30 seconds and can quickly show whether cylinders are relatively equal before a full mechanical teardown in this relative compression overview. That makes it a strong screening step when the earlier checks don't find the fault.
Documentation is what gets approval faster
The technical side solves the problem. The process side gets the job authorized.
A clean shop routine looks like this:
- Write a three-cause test plan before testing. That keeps diagnosis focused.
- Time-stamp every reading. Voltage, fuel pressure, and RPM snapshots matter.
- Attach scan data and waveforms to the ticket. Evidence cuts down on phone explanations.
- Present findings through digital inspection software. Photos and readings help customers approve deeper work.
One option shops use for this is RedAppy, which combines digital inspections, estimates, invoicing, parts ordering, a digital shop board, and vehicle history in one system. On a crank-no-start job, that helps the team show the failed test result clearly before teardown gets more involved.
The repair order should tell the story without the technician standing next to it.
Consistent documentation also helps the next tech. When a no-start comes back, the shop can see exactly what was tested, what was proven, and where the fault lived. That's how one hard job becomes a repeatable process instead of a memory contest.
When a crank-no-start diagnosis starts eating bay time, the problem usually isn't the vehicle. It's the workflow, the documentation, or the approval process. RedAppy gives shops a practical way to document test results, build digital inspections around real findings, and move customers from diagnosis to approval without losing momentum.
Ready to Transform Your Shop?
RedAppy helps auto repair shops create professional digital estimates with photos and videos, send them instantly via text or email, and get customer approvals in seconds. No credit card required to start.