
Car Inspection List: A Complete Checklist for Every Vehicle
A thorough inspection list for cars is one of the most practical tools in automotive maintenance — yet most drivers never see one until something goes wrong. Whether you're buying a used vehicle, preparing for a state safety inspection, or running a shop that handles dozens of jobs a week, a structured checklist prevents costly oversights and protects both the vehicle and the people inside it. According to the, vehicle defects and poor maintenance contribute to hundreds of thousands of crashes each year.
This guide covers every major system a proper vehicle inspection should address — from brakes and tires to fluids, lights, and structural components. Each section follows a logical order that mirrors how professional technicians move through a vehicle, so the list works equally well in a driveway or a professional bay.
For shop owners and service writers, a standardized checklist also drives revenue and trust. Shops that use digital inspection tools — like those built into platforms such as RedAppy — report higher work approval rates because customers can see photos and findings in real time, not just a verbal recommendation. This article gives you the complete framework, whether you're working from paper or a screen.
Table of Contents
- What a Car Inspection Covers (And Why It Matters)
- The Complete Car Inspection Checklist (All Systems)
- Conclusion
- Frequently Asked Questions
What a Car Inspection Covers (And Why It Matters)
A car inspection is a structured evaluation of a vehicle's key systems to confirm they are safe, functional, and compliant with applicable standards. Two distinct types exist: state-mandated safety inspections, required by law in many states on an annual or biennial basis, and routine maintenance inspections, performed by repair shops at scheduled service intervals regardless of legal requirements.
State inspections focus on a defined list of safety-critical components — brakes, lights, tires, and emissions in most jurisdictions. Routine inspections go further, covering fluids, belts, hoses, filters, and other wear items that affect reliability but may not trigger a legal failure. Both serve the same underlying purpose: catching problems before they cause breakdowns or accidents.
Vehicles with identified defects are three times more likely to be involved in a crash than properly maintained vehicles, according to research cited by the.
A standard car inspection covers brakes, tires, steering, suspension, lights, exhaust, fluid levels, safety equipment, and the engine. The exact scope depends on whether the inspection is state-mandated, pre-purchase, or shop-initiated.
The Complete Car Inspection Checklist (All Systems)
The sections below cover each major vehicle system. For each one: what is checked, what a failure looks like, and why it matters to safety or reliability.
Brakes and Wheels
Brakes are the most safety-critical system on any vehicle. Inspectors check brake pad thickness, rotor condition, caliper function, and brake lines for leaks or corrosion.
- Brake pads: Minimum safe thickness is generally 2–3mm. Worn pads cause extended stopping distances and rotor damage.
- Rotors: Look for scoring, deep grooves, or warping. Warped rotors cause pulsation through the brake pedal under heavy braking.
- Calipers: Seized calipers cause uneven braking and accelerated pad wear on one side.
- Wheel bearings: Checked for roughness or play. A failing bearing produces a grinding or humming noise that changes with vehicle speed.
- Tire tread depth: The legal minimum in most U.S. states is 2/32 of an inch, measured with a tread depth gauge or a penny test. Below this threshold, wet-road stopping distance increases significantly.
- Tire pressure: Checked against the manufacturer's specification, typically found on the door jamb sticker. Both over- and under-inflation accelerate uneven tread wear.
Key failure signals: Brake fade under repeated stops, pulling to one side during braking, and uneven wear across a tire's width.
Engine and Fluid Levels
The engine compartment inspection covers both mechanical components and fluid condition. Low or degraded fluids are among the most common causes of preventable engine damage.
| Fluid | What to Check | Typical Change Interval |
|---|---|---|
| Engine oil | Level, color, viscosity | Every 5,000–10,000 miles (synthetic) |
| Coolant | Level, freeze protection, pH | Every 30,000–50,000 miles |
| Brake fluid | Level, moisture content | Every 2 years or 30,000 miles |
| Power steering fluid | Level, color | Inspect annually |
| Transmission fluid | Level, odor, color | Every 30,000–60,000 miles |
| Windshield washer fluid | Level | Top off as needed |
Beyond fluids, inspectors examine:
- Belts: Serpentine and timing belts are checked for cracking, fraying, or glazing. A snapped timing belt can cause catastrophic engine damage.
- Hoses: Coolant and vacuum hoses are checked for softness, bulging, or hardness — signs of imminent failure.
- Visible leaks: Oil, coolant, or transmission fluid pooling under the vehicle indicates an active seal or gasket failure.
An engine running low on coolant can overheat within minutes under highway driving conditions. Catching a small leak during inspection prevents a much larger repair.
Lights and Electrical Systems
All exterior lighting is inspected for function and aim. A single failed brake light is grounds for a failed state safety inspection in most jurisdictions and is one of the leading reasons vehicles are stopped by law enforcement.
- Headlights: Check high and low beams. Aim is verified — headlights pointed too high blind oncoming drivers; too low reduce visibility.
- Taillights and brake lights: All three brake light positions (including the center high-mount stop light) must function.
- Turn signals and hazard lights: Front and rear, both sides.
- Reverse lights: Must illuminate when the transmission is in reverse.
- Dashboard warning lights: An illuminated check engine, ABS, or airbag light indicates a stored fault code that requires diagnosis before the inspection can pass.
- Battery condition: Tested for voltage and cold cranking amps (CCA). According to, batteries more than three years old should be load-tested annually, as failure rates increase sharply after that threshold.
Steering and Suspension
Steering and suspension components affect vehicle control and tire wear. Problems here often develop gradually, making them easy to overlook without a structured inspection.
- Shocks and struts: Checked for oil leaks and damping performance. A worn shock absorber increases stopping distance and reduces stability during emergency maneuvers.
- Tie rods: Inner and outer tie rods are checked for play. Loose tie rods cause imprecise steering and uneven tire wear.
- Ball joints: Inspected for excessive movement. A failed ball joint can cause a wheel to detach from the vehicle.
- Alignment: Not directly inspected on a lift but inferred from tire wear patterns. Feathering or camber wear indicates an alignment problem.
Symptoms that signal a problem: Vehicle pulling to one side, excessive bouncing over bumps, steering wheel vibration at highway speed, and squeaking or clunking over rough roads.
Exhaust and Emissions
The exhaust system carries combustion gases away from the engine and treats them before release. Failures affect both safety and environmental compliance.
- Catalytic converter: Checked for physical damage and function. A failed converter causes increased hydrocarbon and
The Complete Car Inspection Checklist (All Systems)
A complete car inspection covers six primary vehicle systems. Each system has specific components, measurable failure thresholds, and clear warning signs. The sections below follow the order a technician typically works through during a full-vehicle inspection.
Brakes and Wheels
Brakes and tires are the two systems most directly responsible for stopping a vehicle. Failure in either can cause a collision.
Brake Pads and Rotors
Brake pad thickness is measured in millimeters. Most manufacturers set the minimum safe thickness at 2–3mm, though wear indicators (small metal tabs) typically contact the rotor and produce a squealing sound at around 3mm. Pads worn below the minimum cause metal-on-metal contact, which damages rotors and dramatically extends stopping distance.
Rotors should be inspected for:
- Scoring or grooves — caused by worn pads grinding against the rotor surface
- Warping — causes a pulsing or vibrating sensation when braking
- Thickness variation — rotors have a minimum discard thickness stamped on the edge; any rotor at or below this measurement must be replaced
Calipers
Calipers apply pressure to the brake pads. A sticking caliper can cause uneven braking, pulling to one side, or brake fade — a condition where repeated braking causes heat buildup and a temporary loss of stopping power. Inspect caliper slide pins for corrosion and confirm pistons retract properly.
Wheel Bearings
Worn wheel bearings produce a grinding or humming noise that changes pitch with vehicle speed. In practice, technicians test bearings by lifting the vehicle and checking for lateral play in the wheel. Any detectable movement indicates replacement is needed.
Tire Tread Depth
The legal minimum tread depth in the United States is 2/32 of an inch. Most safety organizations, including the, recommend replacing tires at 4/32" for wet-weather safety.
The penny test is a quick field method: insert a penny into the tread with Lincoln's head facing down. If the top of Lincoln's head is visible, the tire is at or below 2/32" and must be replaced.
Inspect tires for:
- Uneven wear — indicates misalignment, improper inflation, or suspension issues
- Edge wear — underinflation (both edges worn) or overinflation (center worn)
- Cupping or scalloping — worn shocks or struts
- Sidewall cracks or bulges — structural damage; tire must be replaced immediately
Tire Pressure
Correct tire pressure is listed on the driver's door jamb sticker, not on the tire sidewall (which shows maximum pressure). Underinflated tires increase rolling resistance, reduce fuel economy by up to 0.5% per 1 PSI drop below recommended levels, and raise the risk of blowout. Check pressure when tires are cold for an accurate reading.
Engine and Fluid Levels
The engine section of a car inspection covers consumable fluids, belts, hoses, and visible signs of leaks or wear. Most of these checks take under ten minutes but can prevent failures that cost thousands of dollars.
Oil
Engine oil lubricates moving parts and prevents metal-on-metal contact. Check the level using the dipstick with the engine off and the vehicle on level ground. Inspect oil color and consistency — new oil is amber and translucent; dark, gritty, or milky oil signals contamination or extended service intervals.
| Oil Condition | Likely Cause | Action |
|---|---|---|
| Dark brown/black | Normal oxidation over time | Change if at interval |
| Milky/frothy | Coolant contamination | Inspect head gasket immediately |
| Gritty/metallic | Internal engine wear | Diagnose before driving |
| Low level | Leak or consumption | Top up; inspect for source |
Conventional oil change intervals are typically every 3,000–5,000 miles. Full synthetic oil can extend that to 7,500–10,000 miles or more, depending on the manufacturer's specification.
Coolant
Coolant (antifreeze) regulates engine temperature and prevents freezing. Check the level in the overflow reservoir — not the radiator cap when the engine is hot. Low coolant can cause overheating within minutes of driving. Inspect coolant color: green, orange, or pink depending on type. A brown or rusty appearance indicates contamination and requires a flush.
Brake Fluid
Brake fluid absorbs moisture over time, which lowers its boiling point and reduces braking effectiveness. Most manufacturers recommend replacing brake fluid every 2 years regardless of appearance. Check the reservoir level and note whether the fluid is clear-to-light-yellow (good) or dark brown (degraded).
Power Steering Fluid
Most modern vehicles use electric power steering and do not have this reservoir. On older hydraulic systems, check fluid level and look for leaks around the pump and steering rack. Low fluid causes heavy or jerky steering response.
Transmission Fluid
Automatic transmission fluid (ATF) should be checked with the engine warm and running (on most vehicles). Healthy ATF is red and slightly translucent. Dark, burnt-smelling fluid indicates heat damage. Many manufacturers specify sealed transmissions with no dipstick — these require a lift and drain plug inspection.
Windshield Washer Fluid
This is a visibility and safety item, not a mechanical one. An empty reservoir during winter or dusty driving conditions impairs the driver's ability to clear the windshield. Fill with a rated washer fluid, not water, to prevent freezing in cold climates.
Belts and Hoses
Inspect the serpentine belt for cracking, fraying, or glazing. According to the, belts should be replaced every 60,000–100,000 miles or at the first sign of visible wear. A failed serpentine belt disables the alternator, water pump, and power steering simultaneously.
Check coolant hoses for:
- Softness or sponginess — indicates internal deterioration
- Hardness or brittleness — heat-related aging
- Swelling near clamps — weak spots that can rupture under pressure
Visible Leaks
Inspect the area beneath the vehicle and the
Brakes and Wheels
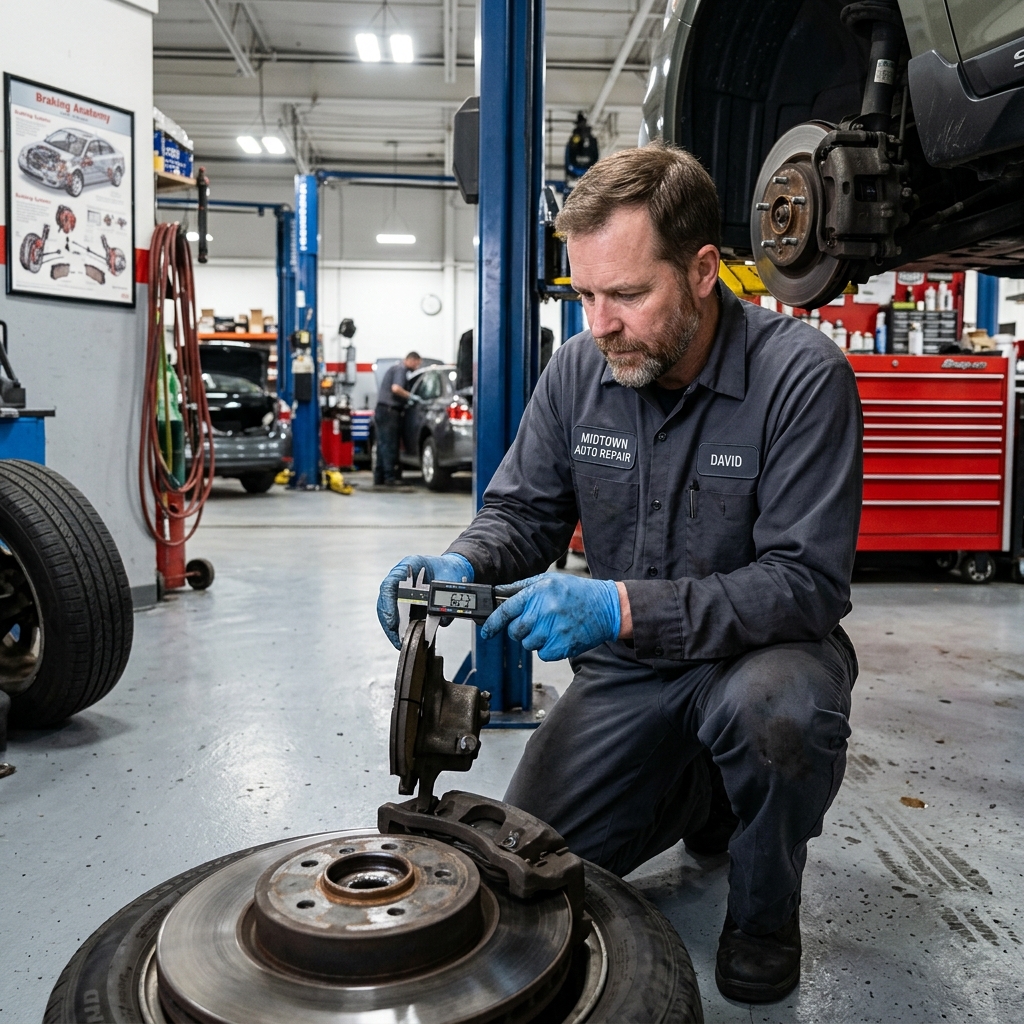
Brakes and wheels are among the most safety-critical systems on any vehicle. A failure here — whether a worn pad, a cracked rotor, or an underinflated tire — can dramatically increase stopping distances or cause a loss of vehicle control.
Brake System Components
Brake Pads
Brake pads press against the rotors to slow the vehicle. Most pads include a wear indicator — a small metal tab that produces a high-pitched squeal when the pad material wears thin. In practice, pads should be replaced when friction material drops below 3mm. Below 2mm, stopping performance degrades noticeably. Waiting until the indicator sounds continuously risks metal-on-metal contact, which damages rotors.
What to look for:
- Pad thickness below 3mm
- Uneven wear between inner and outer pads (indicates a sticking caliper)
- Glazing or cracking on the pad surface
- Grinding or squealing during braking
Rotors
Rotors are the metal discs the pads clamp against. They wear down over time and can develop heat cracks, grooves, or warping. A warped rotor causes pedal pulsation — a vibrating sensation when braking. Most manufacturers specify a minimum thickness (the "discard thickness") stamped directly on the rotor. If the rotor is at or below that measurement, it must be replaced.
Brake fade — a sudden reduction in braking power during hard or repeated stops — often signals overheated rotors or degraded fluid, not just worn pads.
Calipers
Calipers house the pistons that push pads against the rotor. A seized or sticking caliper can cause one pad to wear faster than the other, pulling the vehicle to one side during braking. Inspect calipers for fluid leaks around the piston seals and confirm that all pistons retract properly after braking.
Wheel Bearings
Wheel bearings allow the wheels to spin with minimal friction. A failing bearing typically produces a humming or growling noise that changes pitch with vehicle speed or load. According to the, wheel bearing failure can lead to wheel separation — one of the more serious mechanical failures a vehicle can experience. Inspectors check for looseness by lifting the vehicle and attempting to rock the tire at the 12 and 6 o'clock positions; any play indicates wear.
Tires
Tread Depth
Tire tread channels water away from the contact patch. As tread wears, wet-weather grip deteriorates significantly. The legal minimum tread depth in the United States is 2/32 of an inch, measured at the shallowest groove. Many safety organizations, including the American Automobile Association (AAA), recommend replacing tires at 4/32" for adequate wet-road performance.
The penny test offers a quick field check: insert a penny into the tread groove with Lincoln's head pointing down. If the top of his head is visible, the tire is at or below 2/32" and requires replacement. The quarter test (using Washington's head) indicates 4/32".
| Tread Depth | Condition | Action |
|---|---|---|
| 6/32" or more | Good | No action needed |
| 4/32" | Acceptable | Monitor; plan replacement |
| 2/32" | Legal minimum | Replace immediately |
| Below 2/32" | Unsafe | Do not drive |
Tire Pressure
Underinflation is the leading cause of tire failure. The identifies tire problems as a contributing factor in approximately 11% of pre-crash vehicle-related issues. Correct tire pressure is listed on the driver's door jamb sticker — not on the tire sidewall, which shows the maximum allowable pressure.
Additional tire checks during inspection:
- Sidewall bulges or cracks (indicate internal structural damage)
- Feathering or cupping (indicate alignment or suspension problems)
- Uneven wear patterns across the tread width
Spare Tire
The spare is frequently overlooked. Inspect it for adequate tread and correct inflation. A compact spare ("donut") typically carries a pressure requirement of 60 PSI and a speed restriction of 50 mph — both figures printed on the tire itself.
Brake and wheel condition directly affects whether a vehicle passes or fails a state safety inspection. Learn more about how digital inspections document brake findings for customers with photo evidence and time-stamped reports.
Engine and Fluid Levels
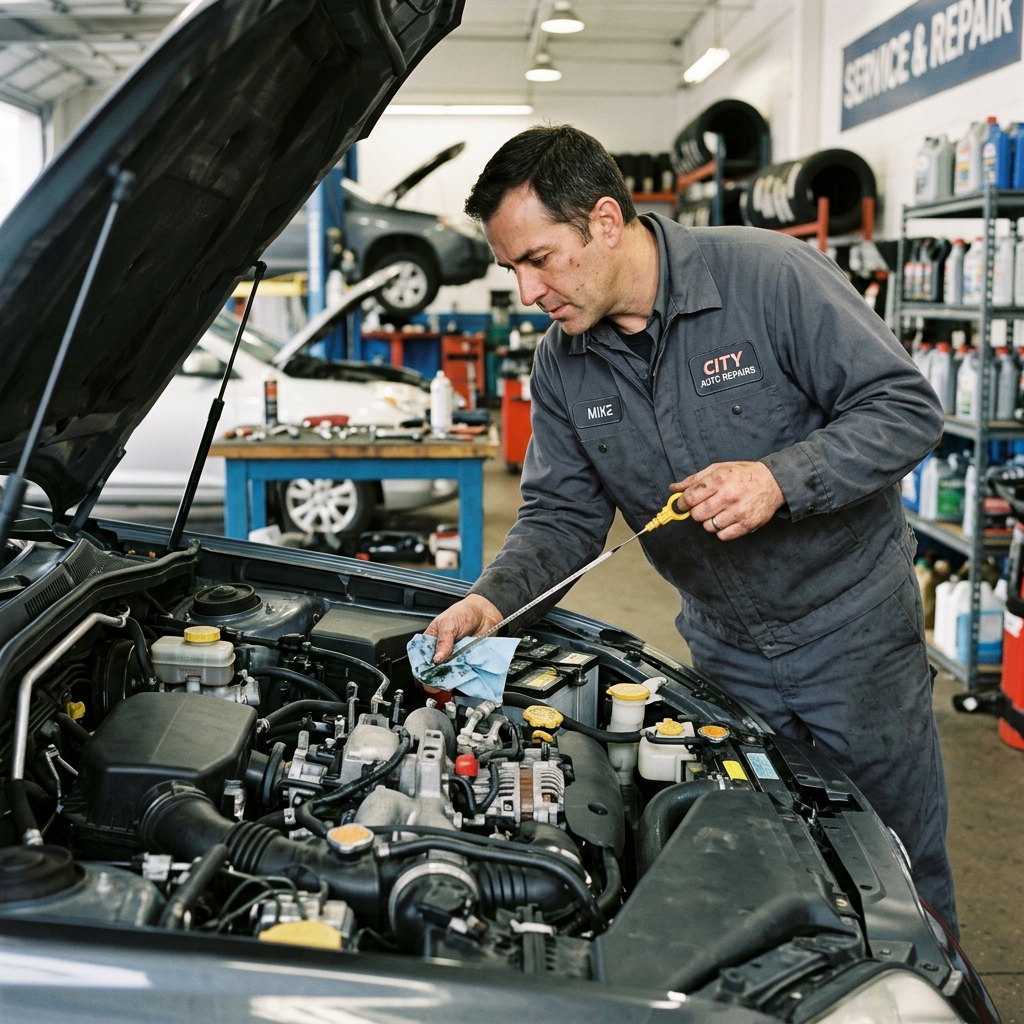
The engine bay contains several fluid systems that must stay within specified levels and condition ranges to prevent mechanical failure. Low or degraded fluids are among the most common — and most preventable — causes of engine damage and breakdown.
Fluids to Check and What They Indicate
Each fluid serves a distinct function, and its condition tells a different story about the vehicle's health.
| Fluid | Normal Appearance | Warning Signs |
|---|---|---|
| Engine oil | Amber to light brown | Dark/black, gritty, milky, or low on dipstick |
| Coolant | Green, orange, or pink; clear | Brown, rusty, oily film, or low level |
| Brake fluid | Clear to light yellow | Dark brown, cloudy, or at minimum line |
| Transmission fluid | Red, slightly sweet smell | Dark, burnt smell, or low level |
| Power steering fluid | Clear to amber | Dark, foamy, or low level |
| Windshield washer fluid | Blue, green, or orange | Low or empty (freezes in cold weather if diluted) |
Milky or foamy engine oil is a reliable indicator of coolant entering the oil circuit — a symptom of a failed head gasket that requires immediate diagnosis.
Engine Oil
Check oil level with the dipstick when the engine is cold and on level ground. The oil should read between the minimum and maximum marks. Also check color and consistency — dark black oil with a gritty texture has lost its protective properties. According to the, engine oil breakdown is one of the leading contributing factors in preventable engine wear.
Most manufacturers recommend an oil change every 5,000 to 7,500 miles for conventional oil and every 10,000 to 15,000 miles for full synthetic, though severe driving conditions (towing, short trips, extreme heat) shorten those intervals.
Coolant
The coolant reservoir should be at or near the "full cold" line. Low coolant is a serious risk — engines can overheat within minutes without adequate coolant circulation. The coolant itself should be clean and translucent. A rusty or oily appearance suggests internal contamination.
Coolant should be flushed and replaced according to the manufacturer's schedule — typically every 30,000 to 50,000 miles, or every two to five years, depending on the fluid type.
Brake Fluid
Brake fluid is hygroscopic, meaning it absorbs moisture from the air over time. As water content rises, the fluid's boiling point drops, increasing the risk of brake fade under heavy use. The reservoir is usually transparent and marked with MIN and MAX lines. Dark or cloudy fluid, or a level near the minimum mark, warrants a closer inspection of both the fluid and the brake pad wear.
Transmission Fluid
Automatic transmission fluid (ATF) should be checked per the manufacturer's method — some vehicles have a dipstick; others require a lift and drain plug access. ATF that smells burnt or appears very dark indicates heat stress and possible internal transmission wear. Many manufacturers recommend ATF replacement every 30,000 to 60,000 miles under normal conditions.
Belts and Hoses
Beyond fluids, the engine bay inspection should include a visual and tactile check of belts and hoses.
- Serpentine belt: Look for cracking, fraying, glazing, or missing ribs. A failed serpentine belt disables the alternator, power steering, and water pump simultaneously.
- Timing belt (where applicable): Replacement is typically required every 60,000 to 100,000 miles. There are usually no visible warning signs before failure — interval compliance is the only reliable protection.
- Coolant hoses: Squeeze each hose to check for soft spots, brittleness, or bulging. Inspect clamps for corrosion or looseness.
- Vacuum hoses: Small cracks or disconnected vacuum lines cause rough idling, misfires, and fault codes.
Visible Leaks
With the vehicle parked on a clean surface for several minutes, inspect underneath for drips or puddles. Oil appears dark and greasy; coolant is typically brightly colored and has a slightly sweet odor; transmission fluid is red or brown; power steering fluid is amber and oily.
In practice, a single inspection pass across the engine bay — checking fluids, belts, hoses, and the ground beneath the vehicle — takes less than ten minutes and can identify conditions that would otherwise go undetected until a roadside failure occurs.
Lights and Electrical Systems
The electrical system is one of the most frequently cited reasons for a failed state inspection. A single burned-out brake light, non-functional turn signal, or dead headlight is enough to trigger an automatic fail in most states.
Exterior Lights
Every exterior light must function correctly and be aimed properly. Inspectors check each of the following:
- Headlights (low and high beam): Must illuminate without flickering. Aim is checked because misaligned headlights blind oncoming drivers even when the bulb itself works.
- Taillights: Must activate when the headlights are on.
- Brake lights: Must illuminate immediately when the brake pedal is pressed. All three brake lights — including the center high-mounted stop light (CHMSL) — are checked.
- Turn signals (front and rear): Must flash at a consistent rate. A rapid flash often indicates a failed bulb elsewhere in the circuit.
- Hazard lights: Both sides must flash simultaneously.
- Reverse lights: Must activate when the transmission is shifted into reverse.
- License plate light: Required by law in all states; frequently overlooked by vehicle owners.
- Fog lights: If installed, must function and be properly aimed.
A failed brake light is invisible to the driver but an immediate legal hazard — it reduces the warning time available to the vehicle behind by a full second or more at highway speeds.
Dashboard Warning Lights
Inspectors also check that the instrument cluster behaves correctly during the ignition cycle. Any warning light that remains illuminated after startup signals an active fault code.
| Warning Light | Common Cause | Inspection Impact |
|---|---|---|
| Check Engine (MIL) | Emissions system fault | Fails emissions-linked inspections |
| ABS warning | Wheel speed sensor or module fault | Fails safety inspection in many states |
| Airbag / SRS | Sensor or clock spring fault | Fails safety inspection |
| Battery / charging | Alternator or battery issue | Flagged for further evaluation |
| TPMS | Tire pressure or sensor fault | Flagged in states that check TPMS |
In practice, an illuminated Check Engine light alone is sufficient to fail an OBD-II emissions test in states that require it. The vehicle cannot pass until the underlying fault is repaired and the code clears through a completed drive cycle.
Battery and Charging System
Battery condition is evaluated both visually and electronically. Inspectors look for:
- Terminal corrosion: White or blue-green buildup that increases electrical resistance
- Case swelling or cracking: Signs of excessive heat or overcharging
- Secure mounting: A loose battery can vibrate, damaging the case or shorting terminals
- State of charge and cold cranking amps (CCA): A load test measures whether the battery can deliver adequate current to start the engine in cold conditions
According to, battery-related failures are among the top three causes of roadside assistance calls in the United States. A battery that tests below 80% of its rated CCA should be considered for replacement before it causes a no-start event.
The alternator output is also checked. A healthy charging system should produce between 13.5 and 14.7 volts at idle with the electrical load on. Output outside this range indicates a failing alternator or voltage regulator.
Wiring and Fuses
Visual inspection of the engine bay wiring looks for chafed insulation, loose connectors, and evidence of rodent damage — a growing problem in vehicles parked in rural or suburban areas. A blown fuse in a safety-critical circuit, such as brake lights or turn signals, must be replaced and the underlying cause identified before inspection passes.
From experience, electrical faults are often intermittent. A light that works during inspection may fail shortly after. Digital inspection tools that photograph the instrument cluster and test results at the time of inspection create a timestamped record that protects both the shop and the customer if a dispute arises later. RedAppy's digital inspection workflow captures this evidence automatically as part of the repair order process.
Conclusion
A structured inspection checklist is one of the most practical tools available to vehicle owners and shop operators. It removes guesswork, creates a repeatable process, and produces a documented record of a vehicle's condition at a specific point in time.
Consistent inspections reduce the likelihood of unexpected breakdowns. According to the, vehicle defects and poor maintenance contribute to a significant share of road accidents each year — most of which are preventable with routine checks. Catching a worn brake pad, a cracked belt, or a failing wheel bearing early costs far less than addressing the failure it causes.
Shops that inspect vehicles systematically — not just when symptoms appear — build stronger customer relationships and generate more approved repairs per visit.
For vehicle owners, working from a defined checklist ensures nothing is overlooked between service visits. For shop operators, a standardized inspection process protects against liability, supports consistent technician performance, and gives customers a clear picture of their vehicle's health.
The shift from paper-based checklists to digital vehicle inspections has made this process faster and more transparent. Photo documentation, timestamped condition notes, and direct links to estimates give customers the evidence they need to understand and approve recommended repairs. In practice, shops using digital inspection tools report meaningfully higher work approval rates compared to verbal or paper-based processes.
RedAppy's digital inspection tools integrate directly with estimates, invoicing, and the shop's workflow board — so findings captured during inspection move into a repair order without manual re-entry. This reduces administrative time and keeps the vehicle's history in one place, accessible for every future visit.
Whether you operate a single-bay garage or a multi-location shop, the inspection list for cars outlined in this guide provides a reliable foundation. Apply it consistently, document the results, and use the right tools to communicate findings clearly — that combination is what turns a routine inspection into a trusted service.
Frequently Asked Questions
What should be included in a car inspection?
A thorough car inspection should cover brakes, tires, lights, steering, suspension, fluid levels, battery, belts, hoses, exhaust system, and windshield wipers. Under-hood components like the engine, transmission, and cooling system should also be examined, along with safety items such as seatbelts and airbag indicators. Most professional inspections also check for fluid leaks, rust, and any dashboard warning lights.
What is the inspection checklist?
A car inspection checklist is a structured document mechanics or inspectors use to systematically evaluate a vehicle's condition across key systems. It typically organizes checks into categories such as exterior, interior, engine, brakes, tires, and electrical components. The checklist ensures no critical safety or mechanical item is overlooked during the inspection process.
What do you need to bring for a car inspection in PA?
For a Pennsylvania state vehicle inspection, you need to bring your vehicle, current vehicle registration, and proof of insurance. The inspection is performed by a PA-certified inspection station, and no additional paperwork is typically required from the vehicle owner beyond those documents. The station will issue a new inspection sticker if the vehicle passes all required safety checks.
What are the requirements for a vehicle inspection in Oklahoma?
Oklahoma requires vehicles to pass a safety inspection covering brakes, lights, tires, steering, horn, mirrors, and windshield condition. Inspections must be performed at an Oklahoma-licensed inspection station, and newer vehicles may be subject to emissions testing in certain counties like Tulsa and Oklahoma City. Vehicles must display a valid inspection sticker, which is renewed annually.
Ready to Transform Your Shop?
RedAppy helps auto repair shops create professional digital estimates with photos and videos, send them instantly via text or email, and get customer approvals in seconds. No credit card required to start.