Parts & inventory
Record a parts purchase and restock
Log what you bought from a supplier in RedAppy: vendor, payment method, items, and the receipt. Tick Inventory Item on a line and the stock count goes up by itself.
A Shop Purchase is one receipt from a supplier. Recording it does two things at once: your expenses are tracked for reports, and any line you mark as an inventory item is added to stock. Shop supplies, tools, and other expenses go on the same form without touching inventory.
Record the purchase
Open Inventory & Purchasing → Shop Purchases and click Create New (or Add Purchase on the Shop Inventory page). Set the Date, pick the Vendor (your suppliers list; add a new one with +), and the Payment Method: Cash, Card, Check, Zelle, Bank Transfer, or Other. Click Add Item. For a part you stock, tick Inventory Item, pick it from your catalog, and enter the Quantity and the Total Cost paid for that line from the receipt. For anything else, leave the box unticked and type an Item Name instead.
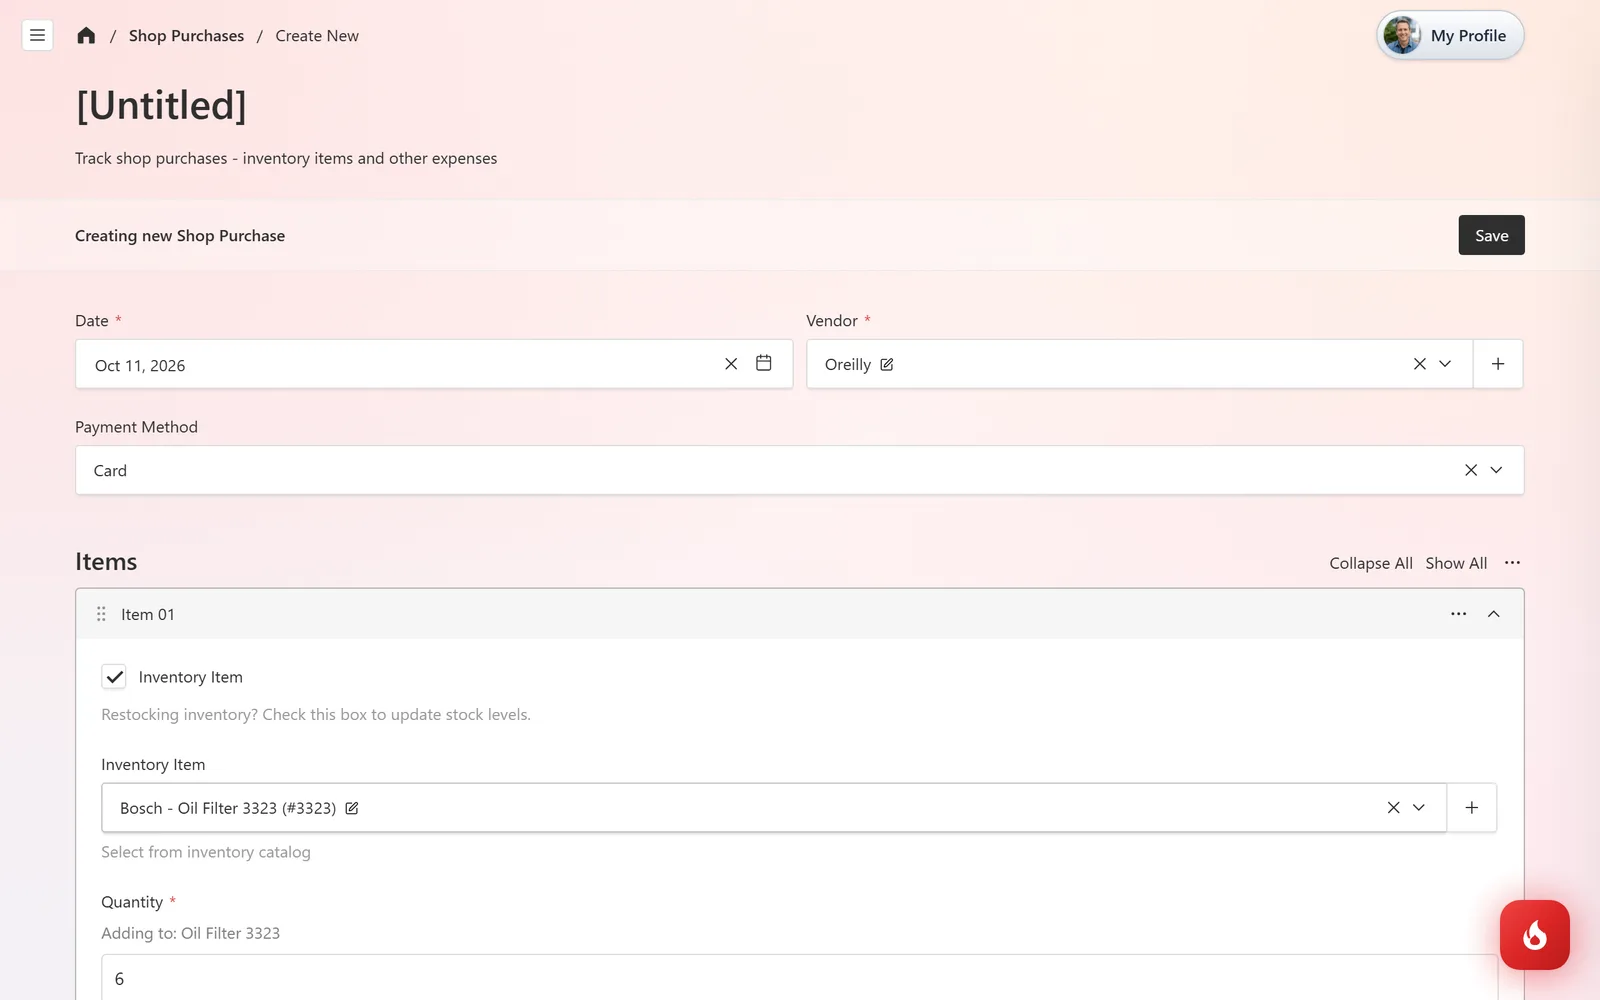
Add more lines as needed, drop the receipt photo into Receipts & Images, and click Save. The Total is calculated from the lines, so it should match the receipt.
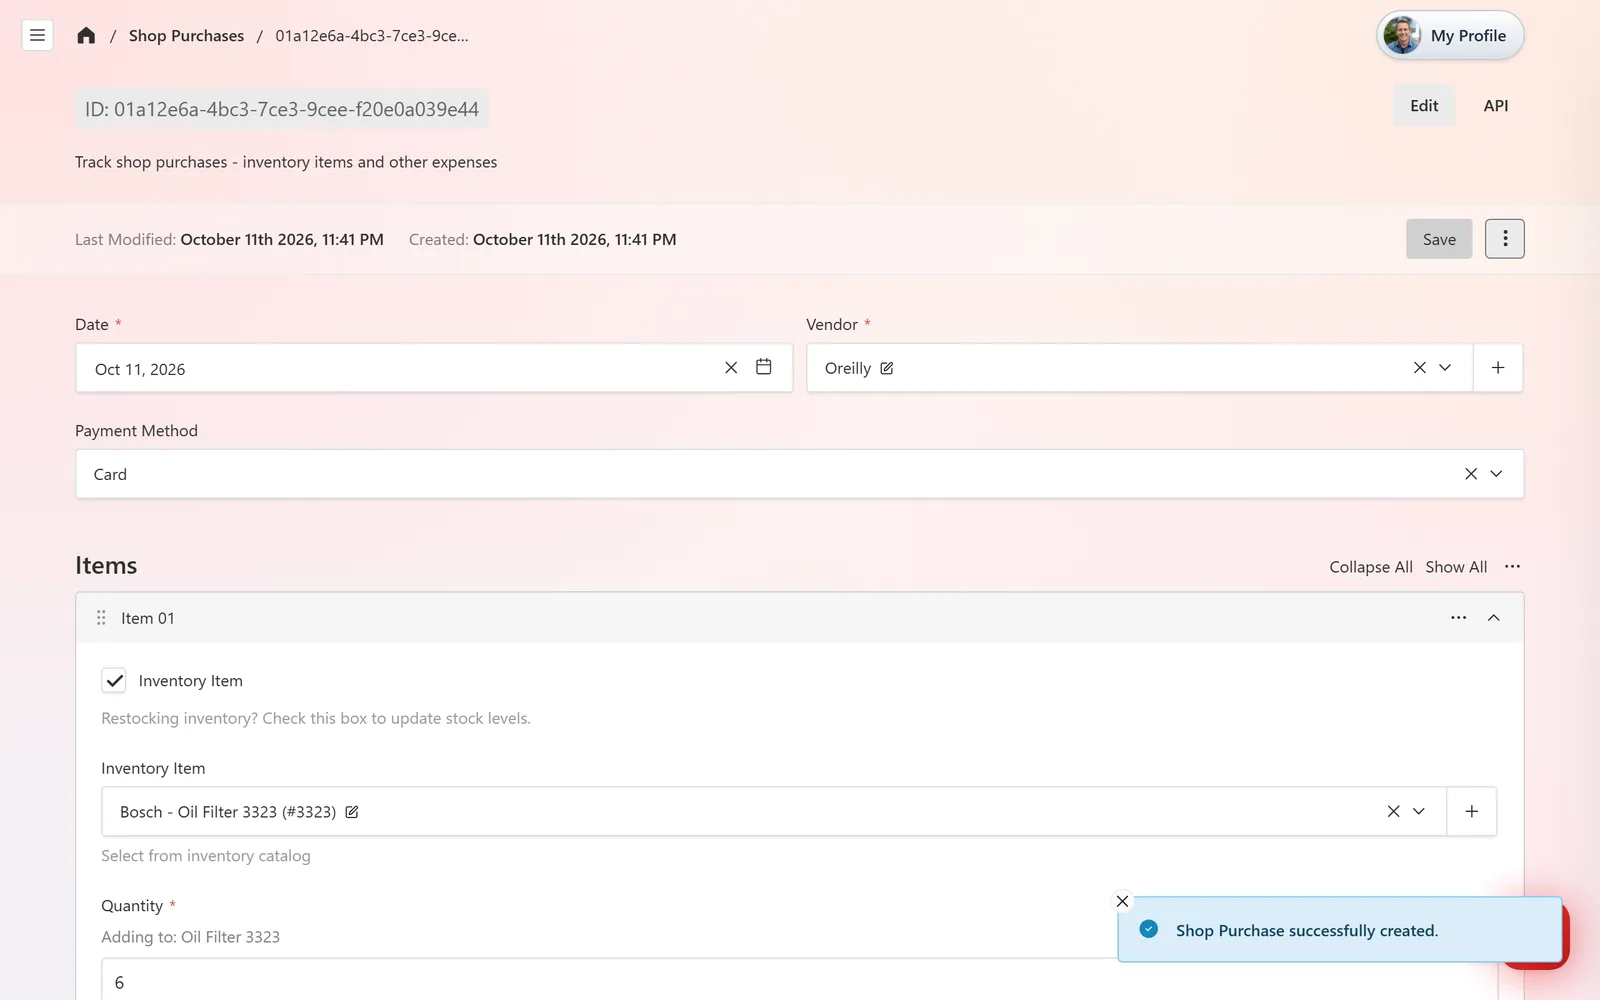
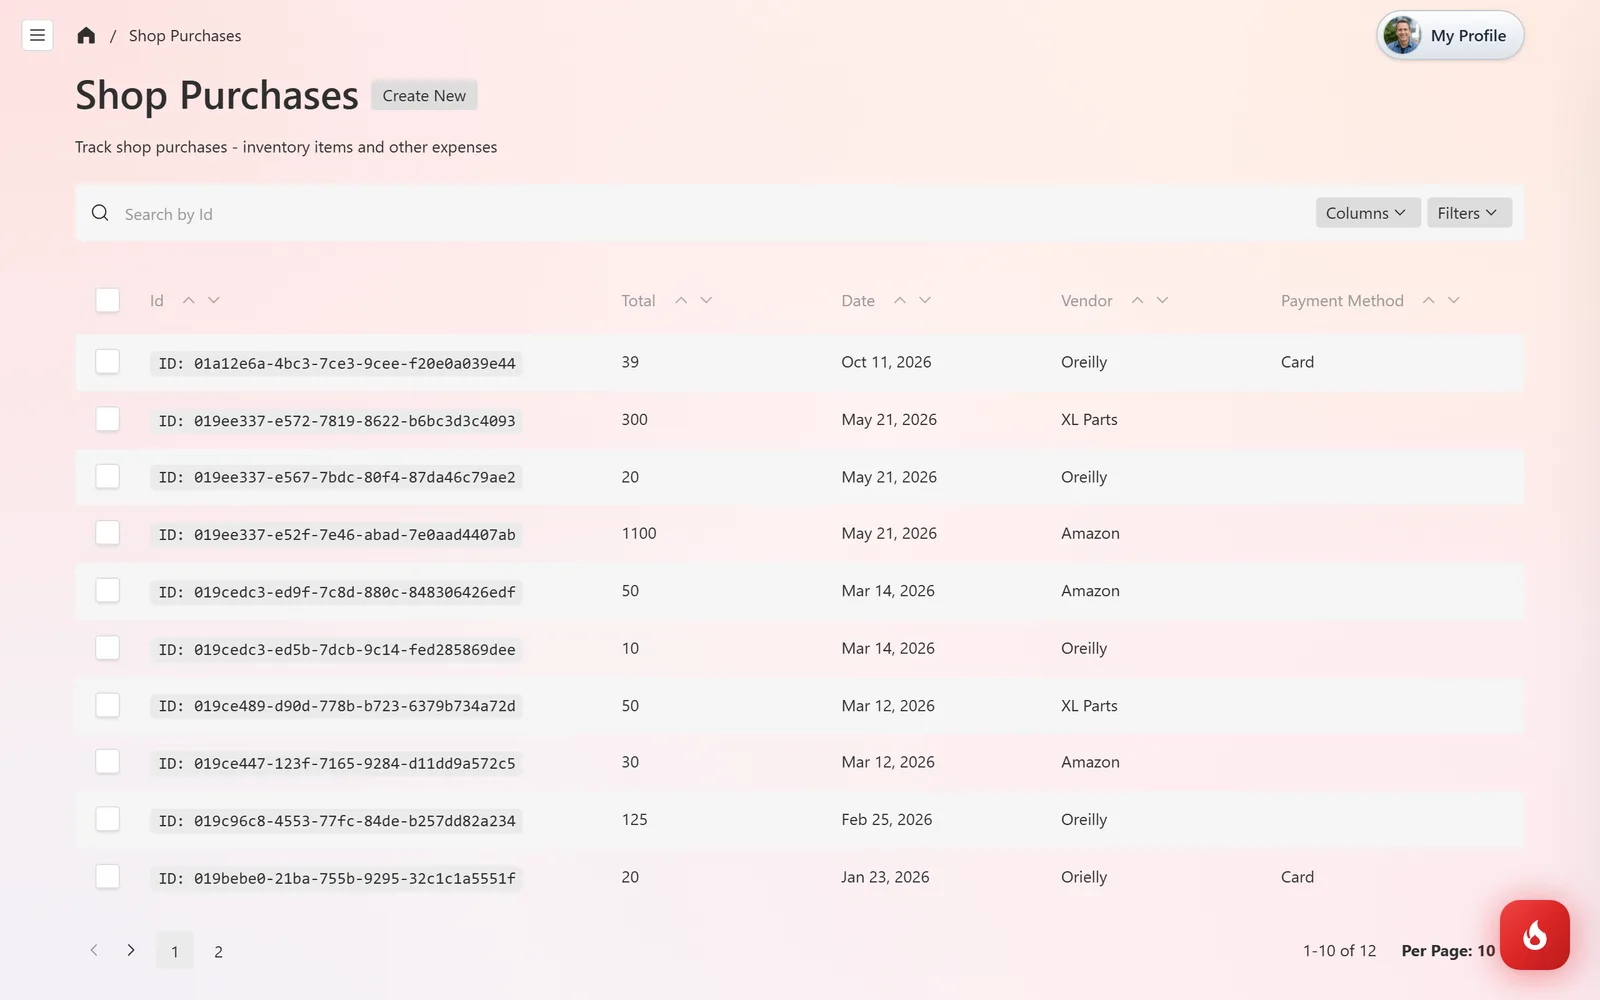
Every purchase is listed under Shop Purchases with its total, date, vendor, and payment method, which is what the expense reports draw from.
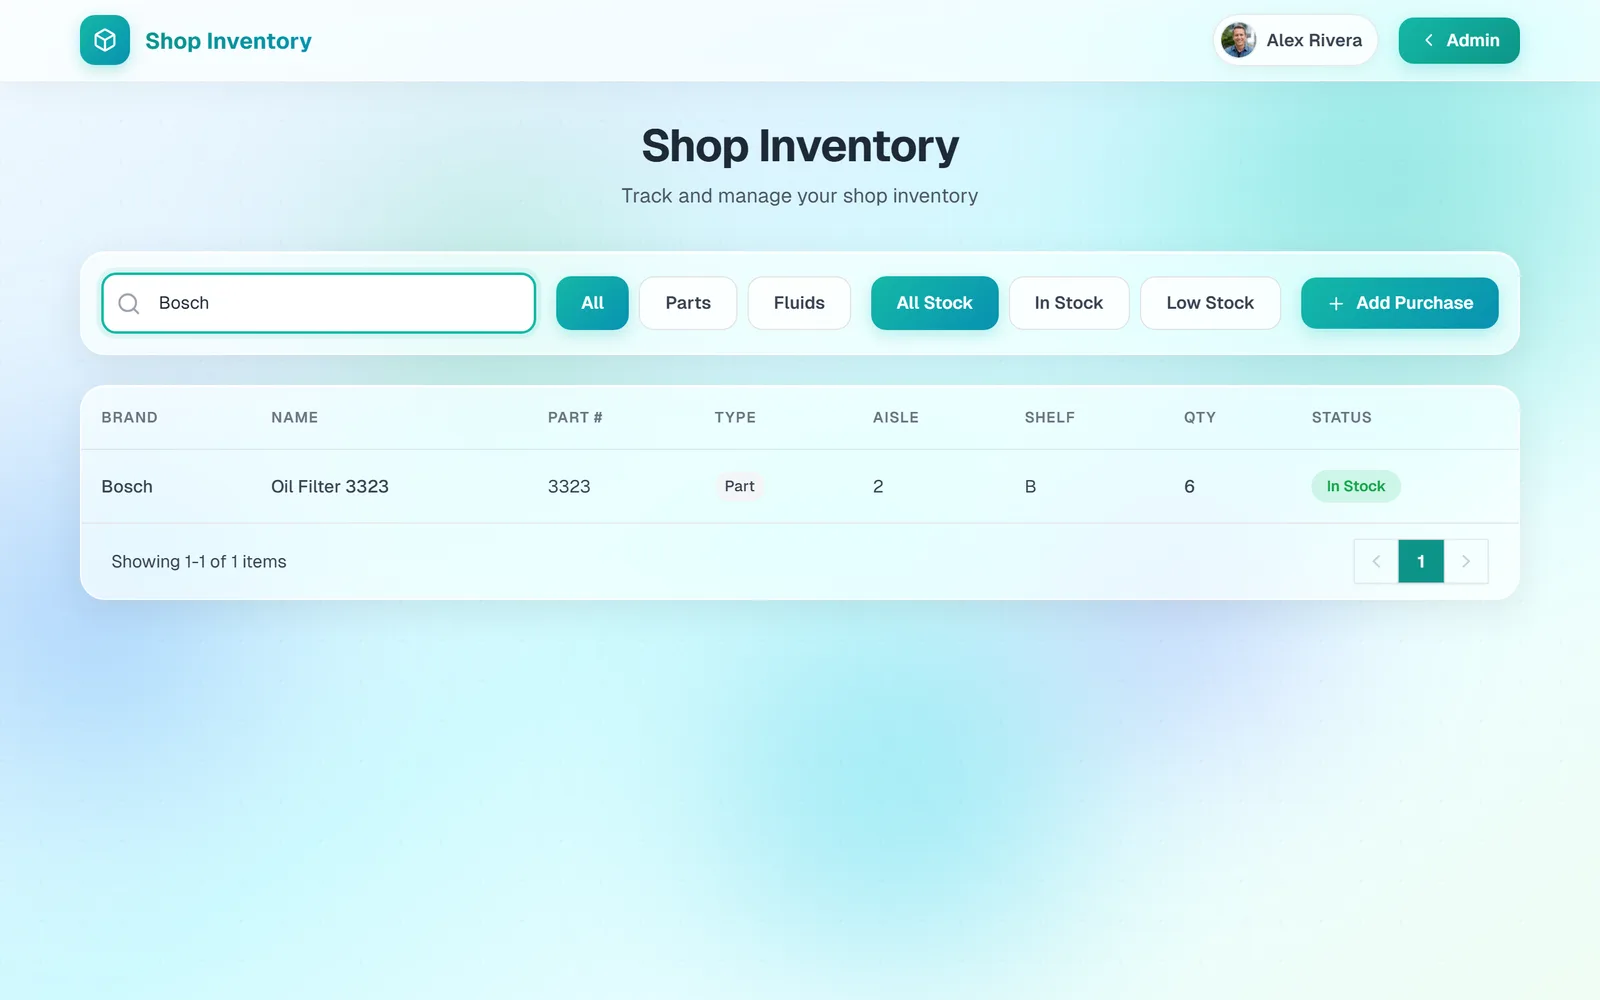
Back on Shop Inventory, the item's count is up by the quantity you entered and its status is back to In Stock.
Frequently asked questions
Yes. Tick Inventory Item only on the lines that go on the shelf. Rags, tools, and coffee go on the same receipt as plain items.
Click + next to Vendor to add them on the spot, with their address, contact, and your account number.
In Analytics, as expenses against your income, broken down by vendor and date.